


When we bought the donor Eunos Roadster for our MX-5e project, it came with a 1.6 engine and automatic gearbox. This variant has the older differential with a 6" crown wheel and these are know for being fragile in higher power applications like ours. It also has an inconvenient final drive ratio of 4.1 : 1, which would result in a top speed below 100mph.
Later variants of the MX-5 used a larger differential with a 7" crown wheel and this has been reliably used in upgraded cars with up to 400bhp. Some of these were also a limited-slip differential with a final drive ratio of 3.636 : 1. According to out transmission design, this would give us a more desirable top speed of 109mph.
The starting point for our upgrade was the purchase of this 2003 Tochigi Fuji Super LSD. The differential weighs 28.7kg and the pair of drive shafts weigh 11.6kg.

The Tochigi Fuji Super LSD is a torque sensing cone clutch type limited-slip differential, which cost us £320 with the matching drive shafts. A distinguishing feature of this variant is the hexagon cross bar visible through the drive shaft sockets.
There are a number of other differences between the 1.6 differential that came with our Eunos Roadster and the newly acquired 1.8 version. The 1.6 has bolt-on drive shafts, whereas the 1.8 has push-in drive shafts. The input flange on the 1.6 differential has four M8 fixing bolts on a 88mm PCD and the 1.8 has four M10 bolts on a 96mm PCD.

The first part of upgrading our differential is to remove the aluminium casing, which is held on by a number of bolts. This shows that our differential is in pretty good condition, with no obvious wear on the teeth of the crown and pinion gears.
The first modification made to our 'new' diff was to send it (less the casing) to McNeill Manufacturing Engineering, to be upgraded so that it can better handle the torque from our Nissan Leaf motor.
It is common to find the LSD 'plates' have broken in these differentials and ours was no exception. We found five plates that had dropped out. We now have our upgraded differential back and ready to go back in the car.
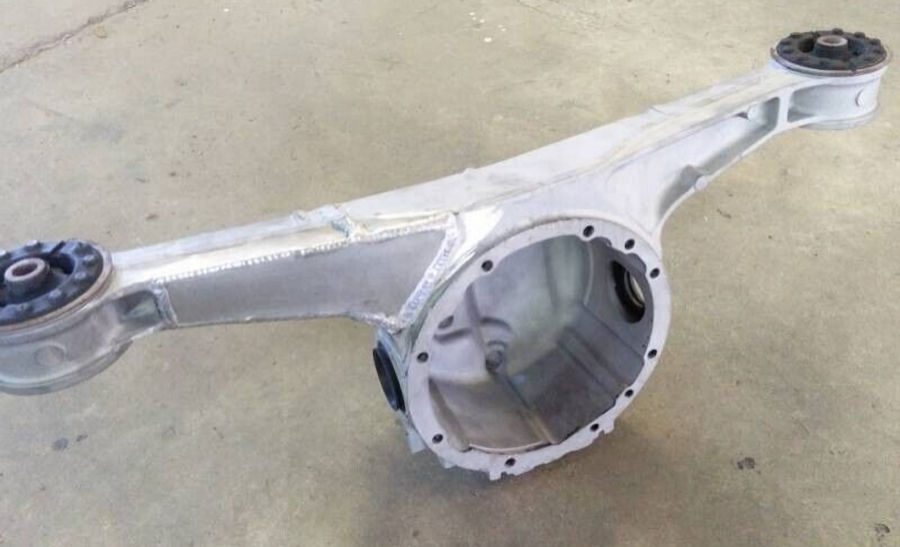
One of the 'arms' of the MX-5 differential is deliberately cast with a 'notch', to create a weak point at a specific location. Some people weld an aluminium plate over this up this weak point, to ensure the differential can handle more power. This is mostly an issue if the Power Plant Frame (PPF) is not used as this prevents the differential from twisting.
It is common to weld up both the front and back face of both arms and this is something we have done, despite planning to use the PPF.

The outside of the diff casing will be shot blasted and welded up by G19 Engineering. The casing as shown weighs 3.8kg.

We cleaned up the inside of the diff casing.

We had the arms of our diff welded up on both sides by G19 Engineering.

We don't know if this is overkill for our MX-5e but, we have an upgrade path to 215hp and 400Nm of torque, so it makes sense to do it right. We have also replaced the side seals before putting it all back together.
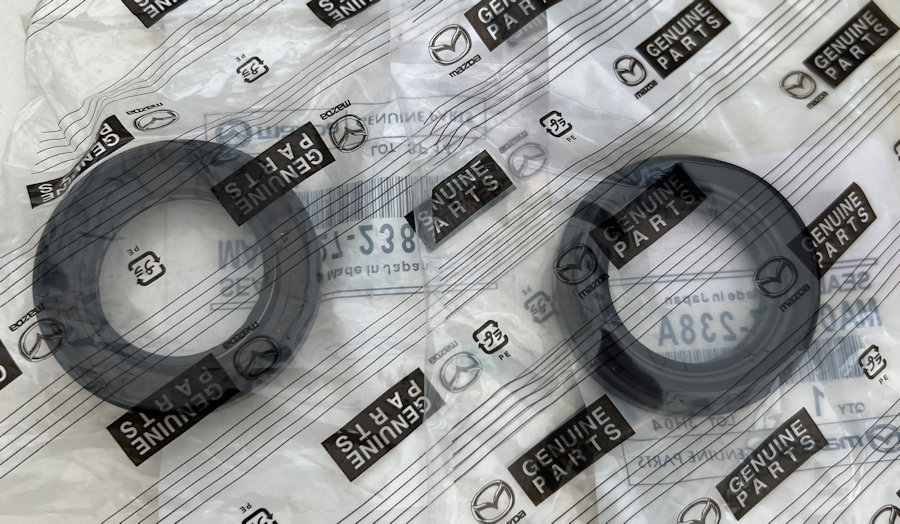
We are fitting new side seals to the diff casing.

We using this Permatex RTV silicone gasket maker from from BOFI Racing between the differential and the aluminium housing.

The MX-5 differential is normally mounted using two rubber bushes and held in alignment with some differential mounting plates. These are in two parts with a ring of rubber 'teeth' to keep them aligned.
There are a lot of upgrade options to make the mounting stiffer. We are use 'race spec' Polybushes. These require a simpler mounting plate and once all the rubber is cut away from the old ones, they look a bit like this.
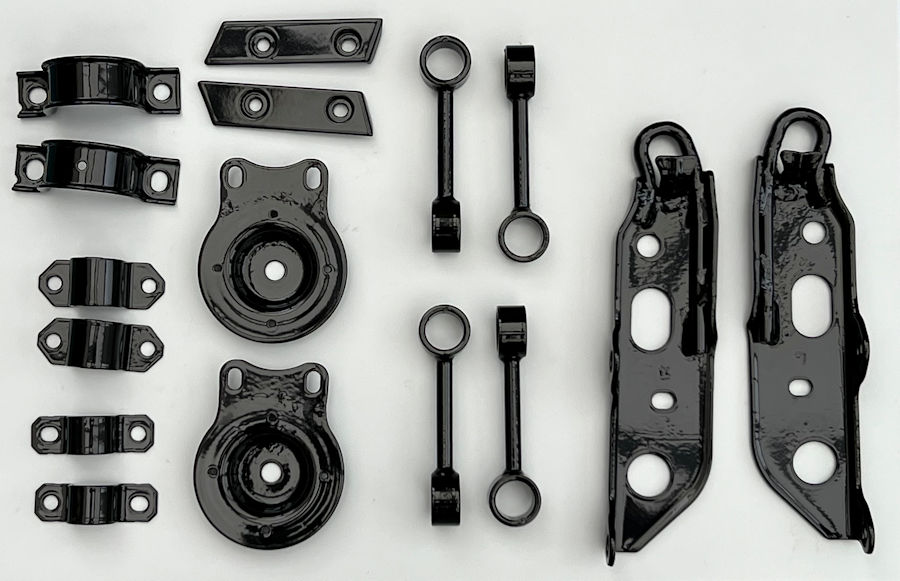
We had our mounting plates powder coated along with the sub-frames, suspension components and a whole load of other parts. Our local powder coaters did a fantastic job and the coated parts look like new.
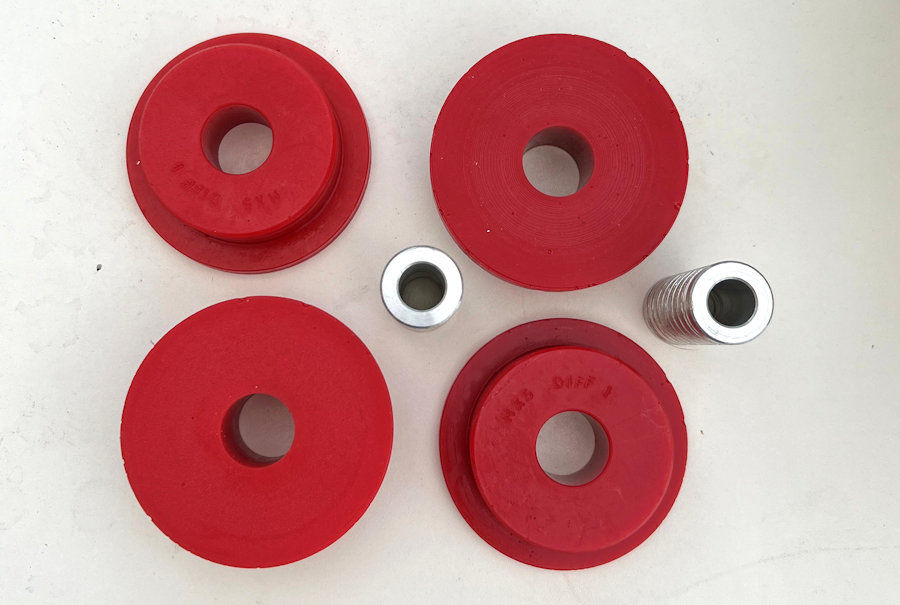
We have bought some 'race' space polybushes from BOFI Racing for our MX-5e. We really don't want the differential moving around with all the torque going through it. Using bushes this stiff may result in some 'whine' coming through into the cabin but, we are going to see how well these works and may put softer ones in later.

Fitting the Polybushes was an easy job. We could push the two halves in by hand. Fitting the metal tube required use of our hydraulic press.
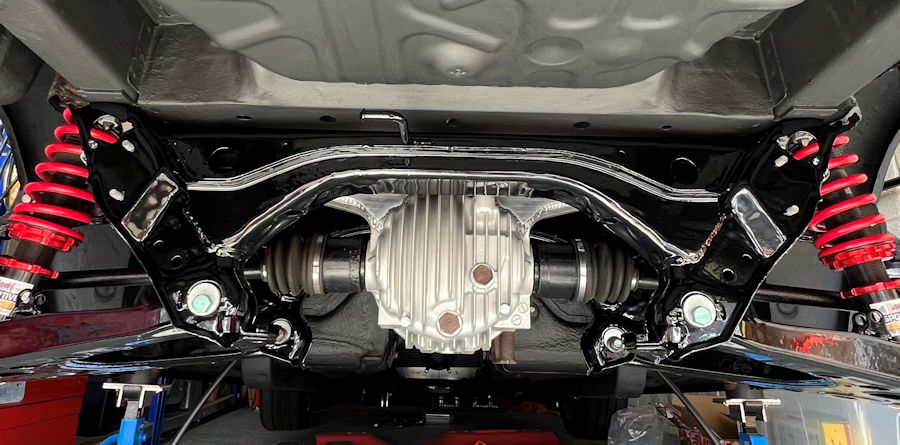
Lifting the diff up into the subframe was a relatively easy process with the two of us. It is held in place by the two main centre bolts through the bush locating/cover plates. The drive shafts are pushed in and we used the upright lower mounting bolts as a pivot to put more force through the driveshaft and get them to pop into place.

We are using Fully synthetic SHC 75W-90 diff oil. The ATF oil shown is for the reduction gearbox. The diff uses less than a litre of oil. The drain plug and fill plug need to be torqued correctly and we used new compression washers.