
Open-Source Sports Electric Vehicle (OSSEV®)

The display unit behind the steering wheel will be the main source of information. This high resolution display will service as the speedometer and most warning lights. The bottom part of the main display will be used to display textual information and messages.
The displays are driven by the Driver Control Unit (DCU).
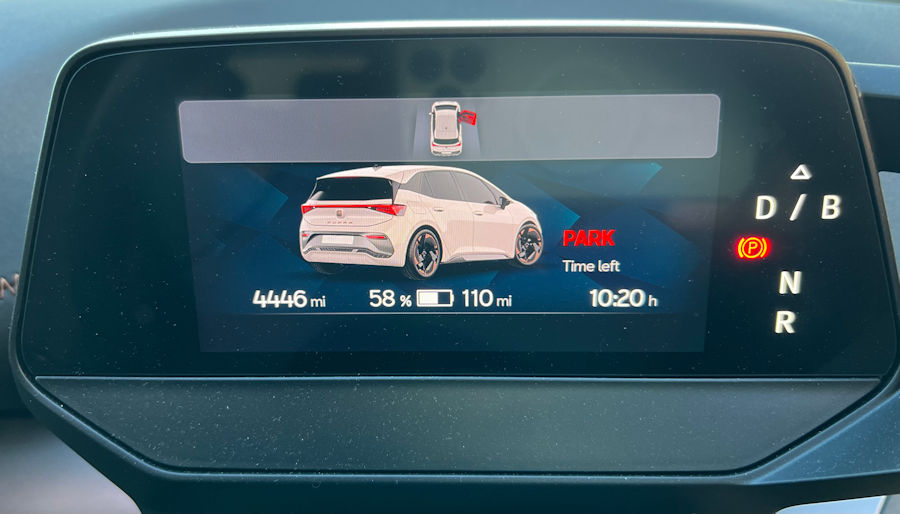
The display unit behind the steering wheel will be clear and simple with high resolution display, much like this one from the CUPRA Born. It is also attached to the steering column so that it moves with it. This display has an aspect ratio of 2:1. We also like the LED indicators either side of the display, used to show 'gear' and also indicators/hazard warning lights.

The key things displayed when driving will be:
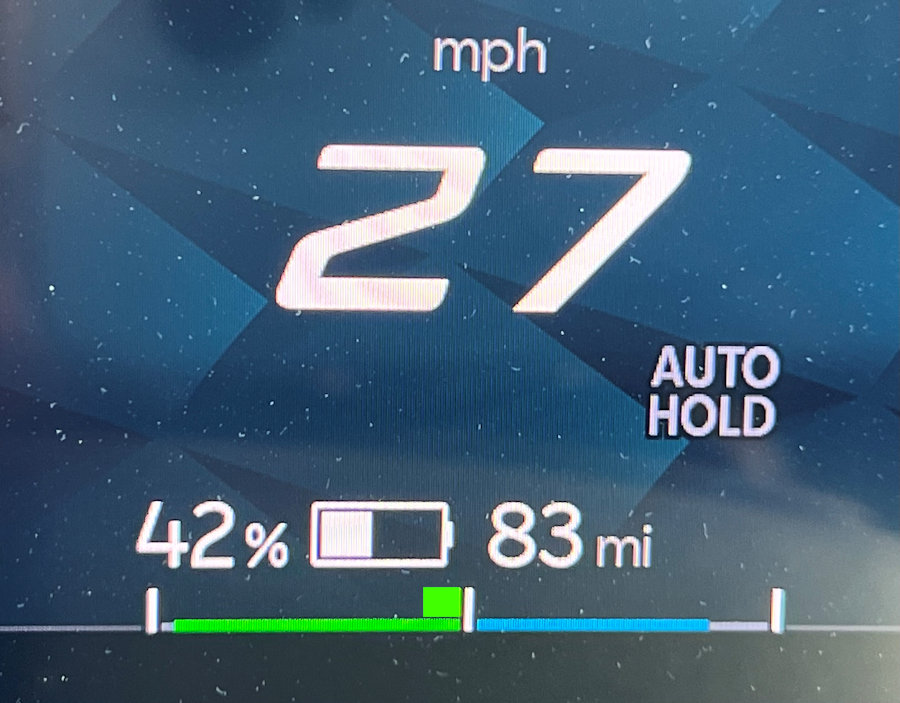
One of the things we really like in our CUPRA Born is the simple power meter. The thin green line represents the amount of regenerative braking available and the thin blue line represents the amount of power available. As you accelerate a thicker blue line expands to the right and shows how much power you are currently using. Under braking a thick green line goes to the left and shows how much regeneration is occurring.
The thin green line shortens as the battery approaches 100%, since it is unable to store as much power in the battery. Similarly, the thin blue shortens as the battery charge approaches zero, because less power is available.
One thing we plan to change is the thickness of the thin lines, to make them clearer. We may also change the blue to another colour.
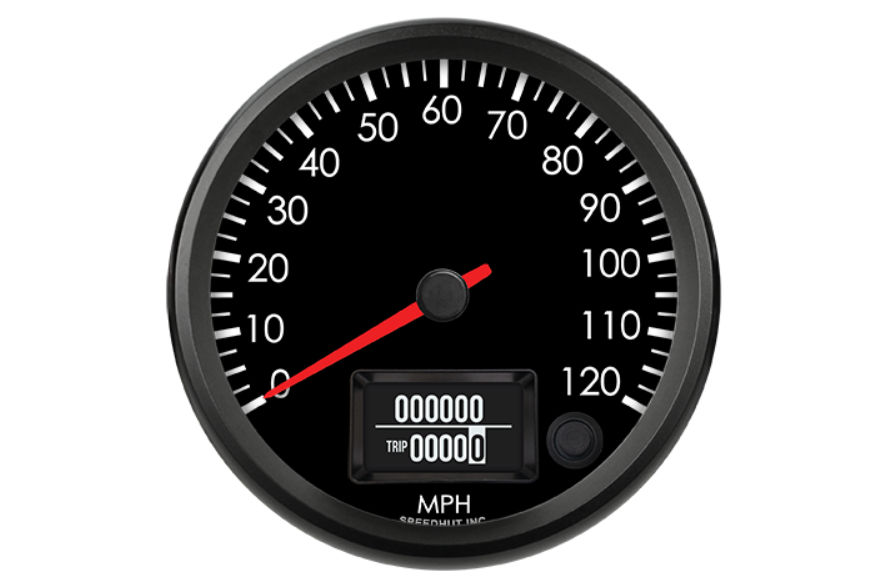
For out MX-5e we are using a nice analogue style, digital speedometer with mileometer and trip and this will be centrally mounted behind the steering wheel.
Having driven a lot of cars, we just know the OSSEV® has to have physical and tactile buttons. The range of touch-sensitive and swipe-controlled features in our CUPRA Born have proved frustrating. Our Mazda CX-30 is actually a great example of how to do switches and controls well, even though some of them are slightly obscured by the steering wheel. We are aiming for excellent ergonomics in the OSSEV®.
The car will use and store preferences for multiple driver profiles. These can be linked to keys or smartphones as part of the Intelligent Security & Personalisation (ISP). The car will recall the last settings used by each driver and also for each driving profile. The goal is that driver selection and personalisation is a zero touch experience.
To keep things intuitive and simple, there will be just four driving profiles. The current profile will be selected using coloured buttons and their settings and the last used driving profile will be remembered and personalised for each driver profile.
The driver profile feature is managed by the Driver Control Unit (DCU) and the experience is personalised. It is selected by a rotary encoder that can cycle continuously in both directions. This also features a push switch to instantly enable the chosen favourite driving profile, e.g. 'Sport'.

The MX-5e is using the ThunderStruck Motors Vehicle Control Unit (VCU) and this has a 3-position FNR (forward, neutral & reverse) switch, with a 10KΩ resistor to 'signal' back to the VCU (5V dc). We are replacing this with a 2-pole, 3-way rotary switch and a large chunky, 3D printed 'gear selection' knob. The second pole is used to light up an LED to provide a visual indicator and to also provide a FNR signal to the Driver Control Unit (DCU). The reverse signal is also used to enable a relay for the reversing light and audible reversing alarm.
After some deliberation, we have decided to go down the route of using 3 buttons instead of an FNR switch. This means the OSSEV® and MX-5e will always start up in neutral and simply pressing a button will select the right mode: forward, neutral or reverse.
One of our pet hates is multi-colour dashboards and instruments. All instrument lighting will be white, unless it is indicating something important with colour. Green is indicative that something is on, orange is a 'warning' colour and red is an 'danger' colour. Standard colours for things like high beam headlights will be retained (i.e. blue).
The indicators will be simple flashing LED lights, without strobing effects. As well as the front and rear indicators lights, the standard side repeaters will be present. There will also be small indicators on the side mirrors, visible to the driver. These are to help remind the driver that they are on, because in open top cars it is sometime difficult to hear the indicator warning sound.
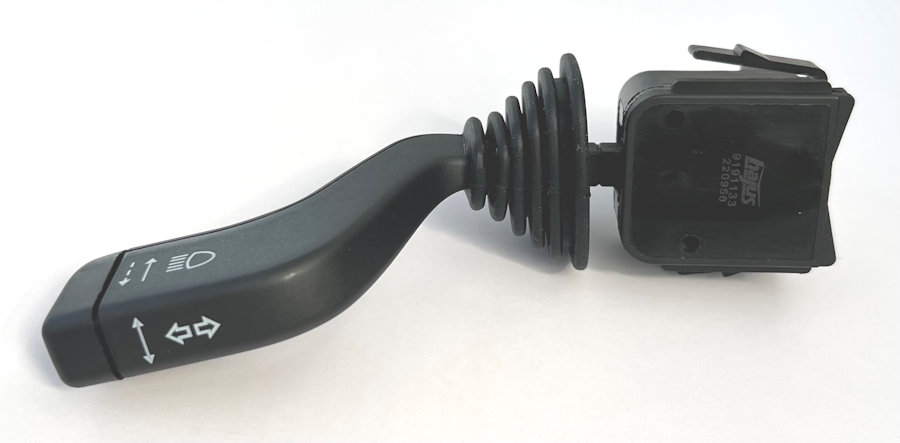
The MX-5e has a switch module with two stalks. The indicators are on the right stalk and this is confusing when most other cars (all of our others cars apart from Yoko) have the indicators on the left stalk.
We sourced this quality indicator stalk and plan to use it in both the MX-5e and OSSEV®. It weighs just 86g. It also has the full beam headlight switch and headlight flash functionality.

The pins are all standard male spade terminals and replicate the pins found on the MX-5e.
For each driver profile and driving profile, it will be possible to set the amount of regenerative braking. this will either be in 10% or 20% increments (will be based on real world testing), using a rotary encoder to give a nice positive feel. It will not cycle through 100% to 0% or 0% to 100%.
This is covered in the steering section.
The handbrake is automatic and is covered in the brakes section.
In the MX-5e we are using the existing hazard light switch on the 'tombstone'.
The horn is operated by the central button on the Momo steering wheel and actives our twin horns via a high-current .
In the MX-5e we have upgraded the rather dated mirror to one from an Audi TT.
The side mirrors will be electrically adjustable and heated. The mirror heating will be switch + app controlled and not automatic, to help reduce energy usage. Pressing the switch will turn on the heater for the set period of time.
The side mirrors will feature bright orange warning lights that show the indicators are on and may also be used for other purposes.

When we bought the Vehicle Control Unit (VCU) from ThunderStruck Motors, we bought a 'kit' of test parts that included this Hall effect throttle pedal. It's made of very hard plastic and is designed for use in things like fork-lift trucks. Because of this, it has very limited movement, just 17°. The internal 'gearing' actually moves the sensor input shaft about 45° though.
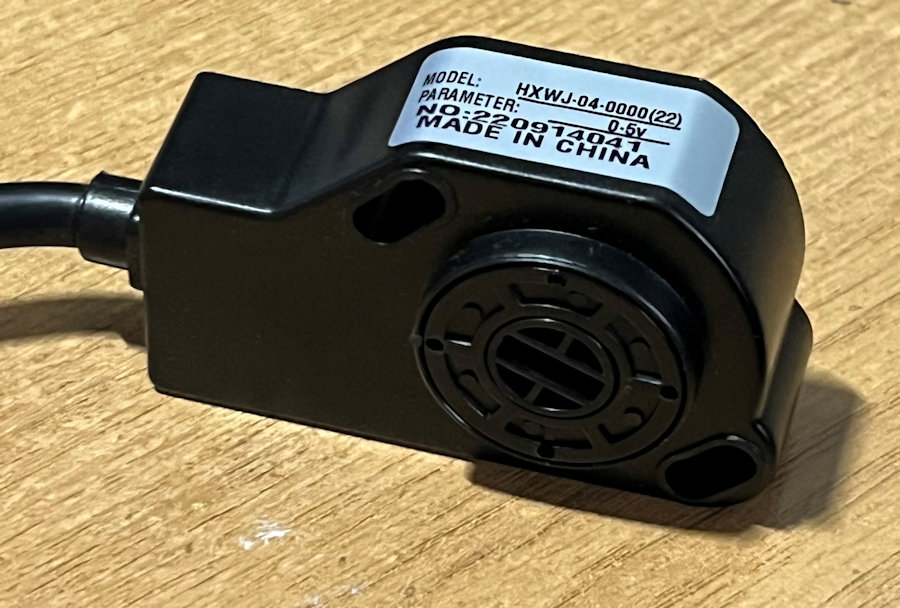
The sensor on the above throttle pedal is just bolted to it though and can be easily removed. The sensor has an internal spring and is actually able to measure rotational movement greater than 180°.
The plan is to reuse this on the MX-5e and to use the throttle to directly drive this sensor. We are aiming for about the same 45° of rotation on the input shaft using a direct rod linkage.
With the MX-5e, we are using the existing throttle pedal to pull a throttle cable. The point on the pedal at which the cable attaches moves about 45mm. With a cable on a cable pulley, rotating 90°, we need a cable pulley 57mm in diameter. We are using a slightly smaller one at 55mm in diameter.
There will be 3 up/down switches on the driver's door for controlling the windows. The central switch will be for the rear window. All will feature one touch up/down and push and hold for controlled up/down operation.