

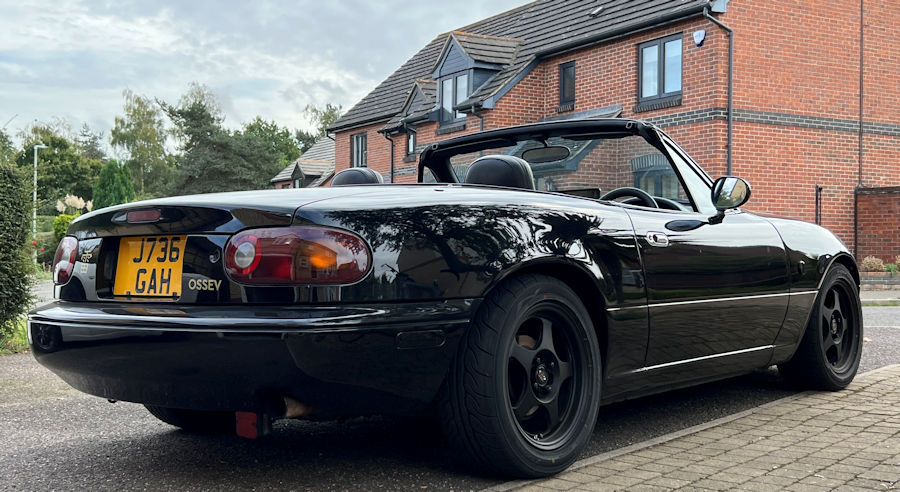
The focus on this month is on getting the car back together with every working on the 12V side. This means wiring up the lights, heated seats, HVAC, iBooster, etc. We are also refitting everything we can (bumpers, bumper stays, arch liners, etc.) to ensure that they don't interfere with any of the EV stuff that we will be fitting soon.
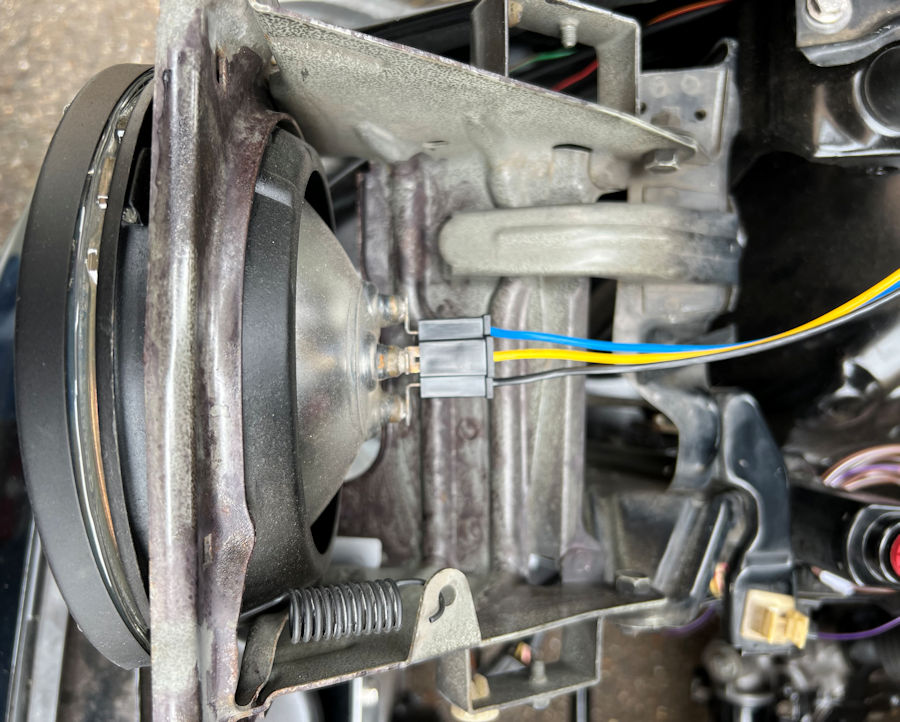
The shocking weather is slowing us down 🙁 We are continuing with the 12V wiring though. We are completely rewiring the headlights right back to the H4 bulb connectors. All this wiring will be covered and fixed to the old fixing points.
We are also completely rewiring the pop-up headlights (headlight retraction mechanism) with new connectors and local change-over relays. This gives us a lot more control and massively simplifies the wiring.
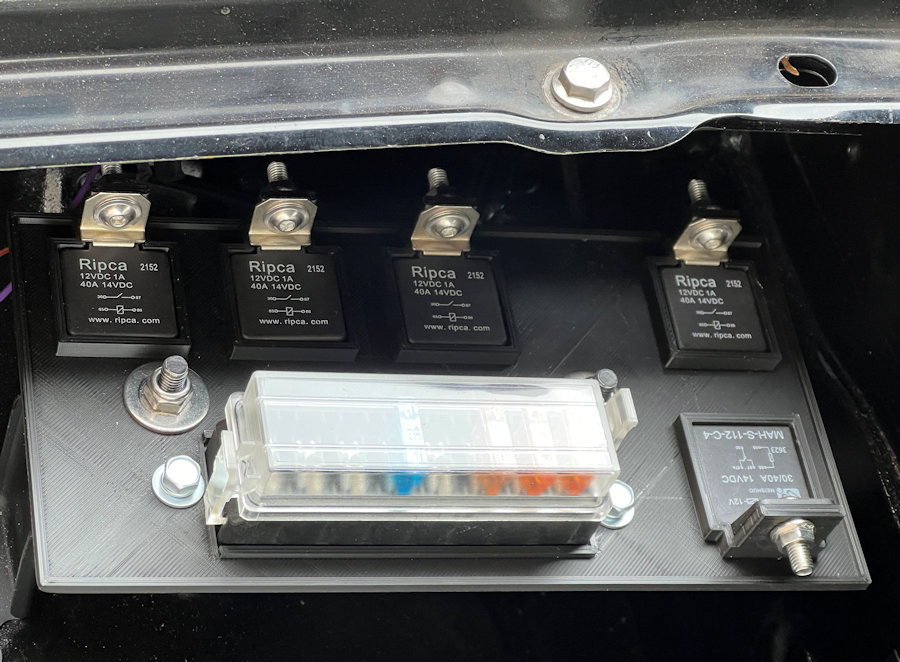
We have finalised all of the designs for fuse boxes and relay boxes. These have been for now but will be laser cut and folded in aluminium. This is the engine bay fuse/relay box.
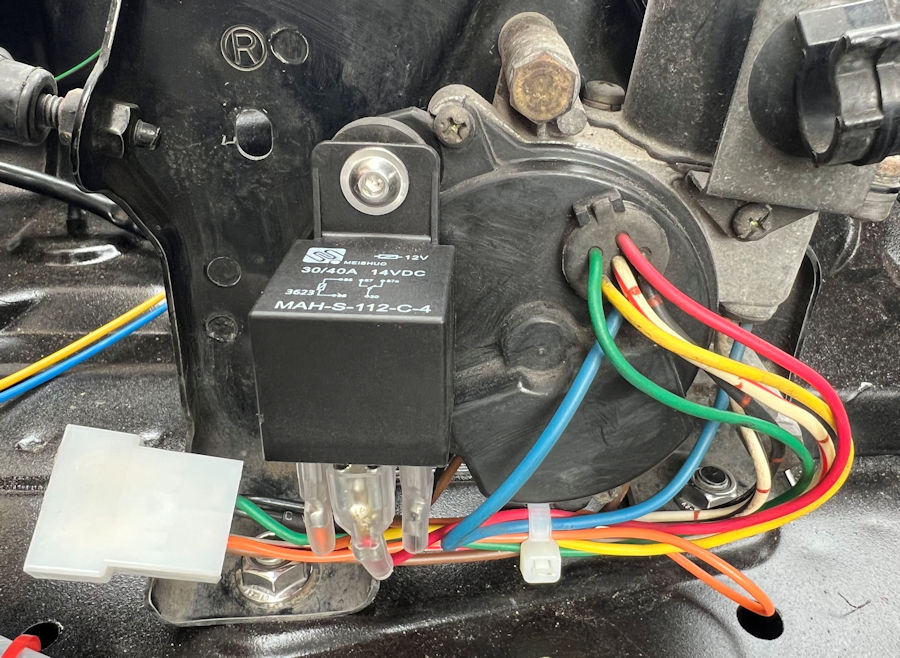
The use of a change-over relay local to the headlight retraction unit simplifies the wiring significantly and provides independent left and right control. These wires will be wrapped, once the wiring as been fully tested.
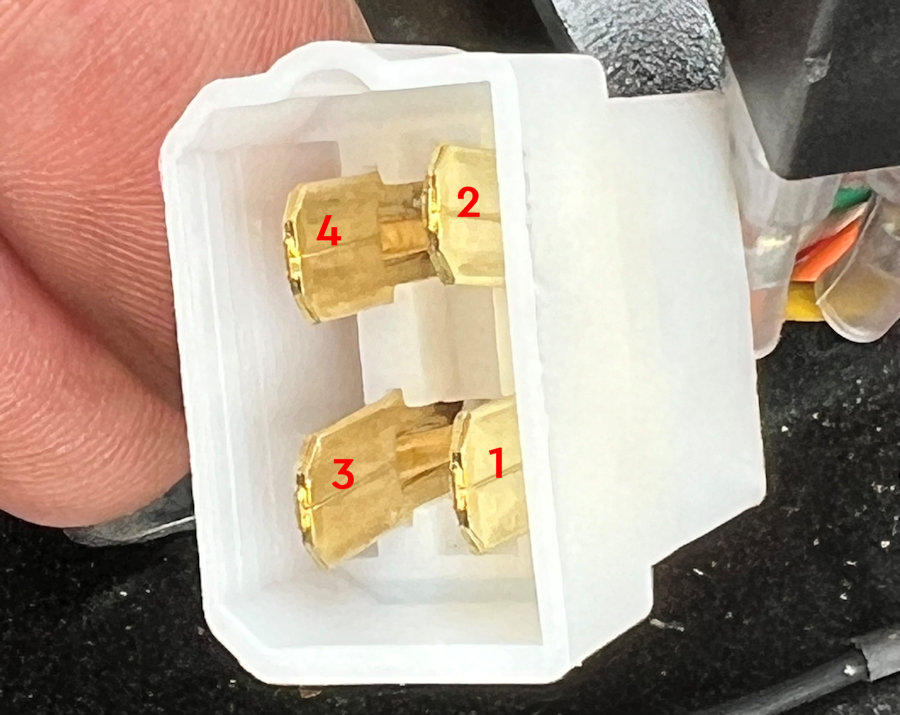
Our 4-pin connector pins are:
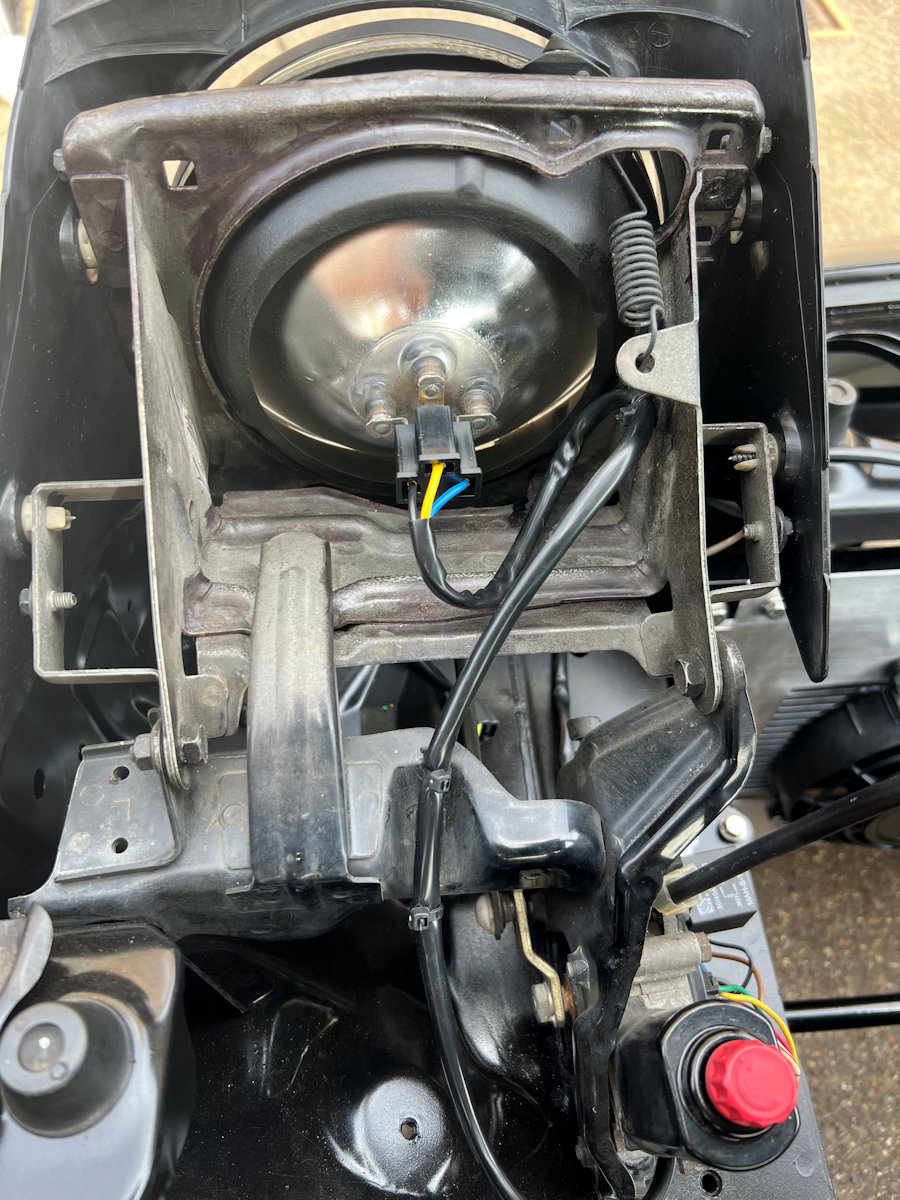
The headlamps are now fully wired up with new connectors and better cables.
More MX-5e wiring today. The rear end is complete and we habve now started in the cabin. We started with the wiring to/from the ignition switch. Having tested the switch module, we discovered some dodgy connections, so we ended up taking the switch apart and cleaning it up internally.

We needed to start thinking about where the dashcam rear camera was going to fit and where the wiring would run. Halfords had a spectacular deal on the Nextbase 522GW bundle that we have fitted in our other cars, so we bought another one to fit into the MX-5e.
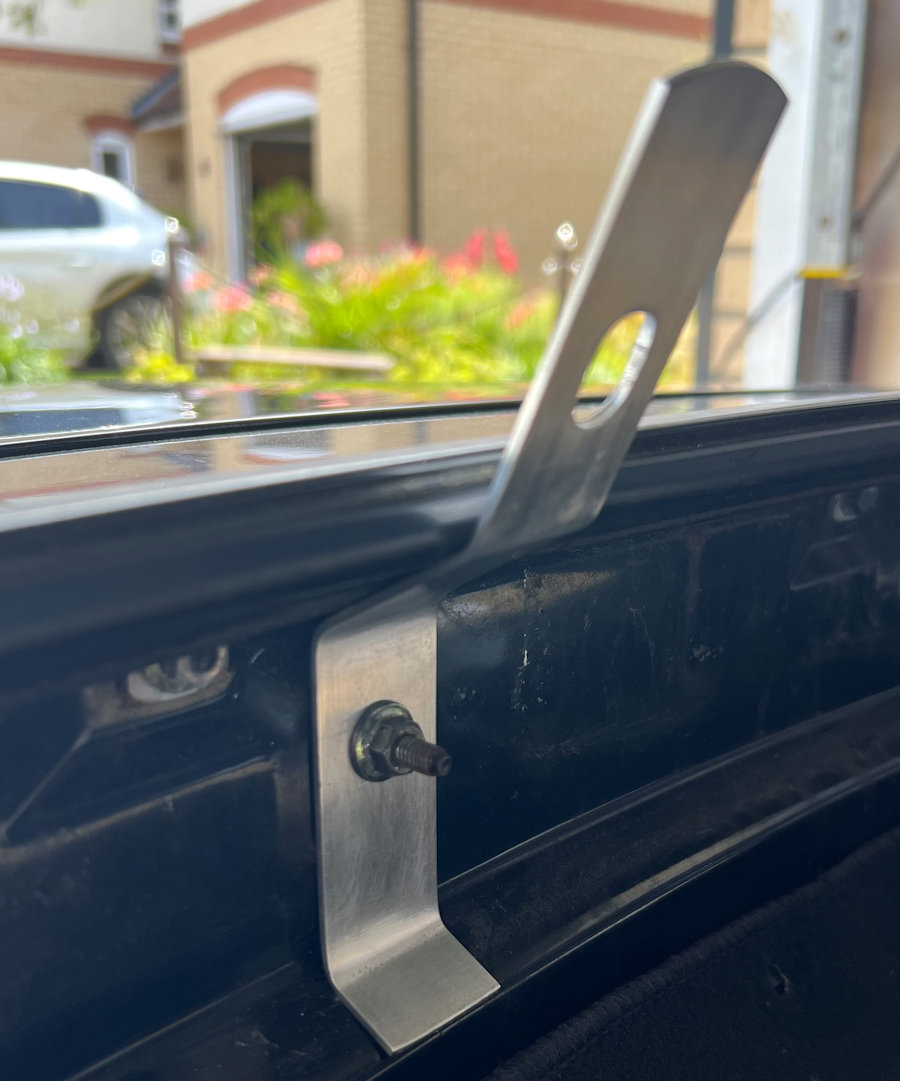
Our original thinking was to mount the cabled rear camera seamlessly into the bodywork and to cut a hole in the rear plinth but, we decided it might be too low down and get dirty very quickly. So we have fabricated this aluminium mount that uses an existing bolt for the roof structure. This will be powder coated black. The camera uses a sticky pad to this mount and magnetic mount/adjuster. The upper hole is for the cable to pass through.
January 2025 •
February 2025 •
March 2025
January 2024 •
February 2024 •
March 2024 •
April 2024 •
May 2024 •
June 2024 •
July 2024 •
August 2024 •
September 2024 •
October 2024 •
November 2024 •
December 2024
January 2023 •
February 2023 •
March 2023 •
April 2023 •
May 2023 •
June 2023 •
July 2023 •
August 2023 •
September 2023 •
October 2023 •
November 2023 •
December 2023