

We have now completed the design for the MX-5e wiring and we are very confident it is all going to work as planned. Before we start the rewiring, we have cleaned up the floor and painted a few bits.
Before we start the rewiring properly, we are just testing the heater blower and heater controls work as we expect. As you can read on our MX-5e rewiring project, we want to reuse the A/C button to enable the PTC heater.

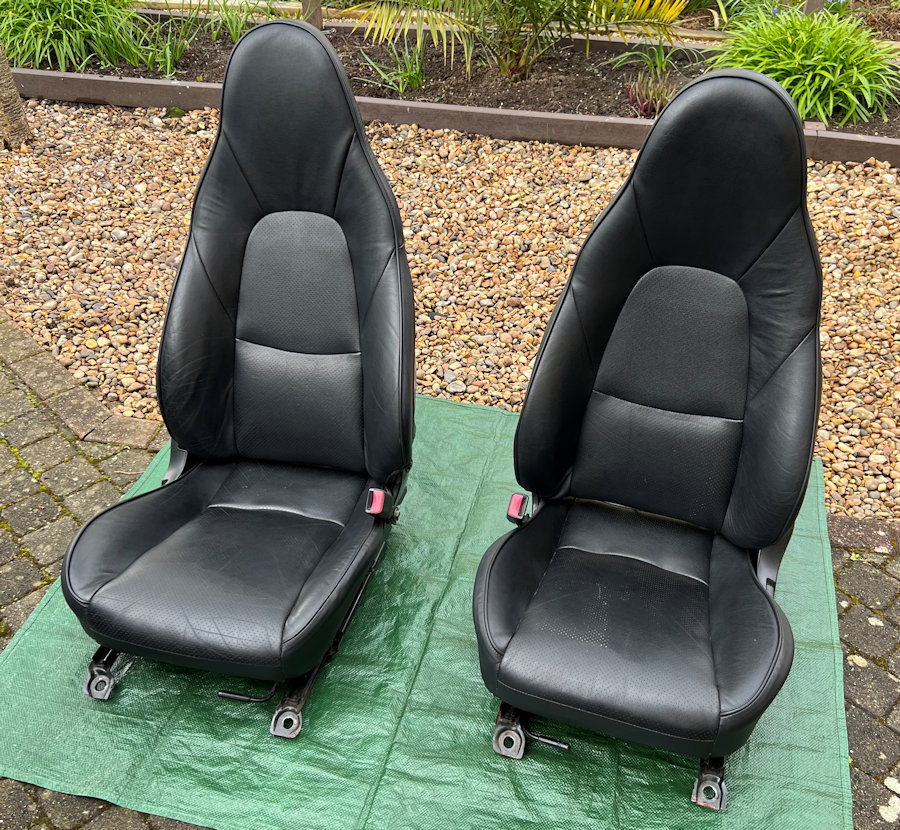
Collected a pair of mk2.5 black leather seats in excellent condition for the MX-5e from Suffolk Mazda😎. We are going to get the leather professionally cleaned and refurbished. The driver's seat weighs 17.1kg and the passenger seat weighs 16.4kg.

Whilst we were checking and cleaning the new seats, we noticed that they are heated. We will be including this capability in our MX-5e rewiring project 😎

The heated seat switches turned up in the post. Just need to find somewhere to mount this now. The wiring of this is quite simple and just 6 wires are used on this double switch.

We are going to struggle with switch space, especially now that we are adding heated seats. So we are replacing the little cubby hole under the radio with a 3D printed switch plate, on which we can mount a number of extra switches. This is just a template for now, to check the measurements and fitment.

We got our measurements just right and this is going to work really well.

We took both the doors off today, in order to get better access to any rust behind them and treat it. This is the passenger side. Very little rust really, just a little bit where the door hinges attach.

This is the driver side, very similar.

We grind off any rust and are using Buzzweld glass reinforced primer (orange) where required. This is then covered with Buzzweld WAR underseal.

We finished painting under the front arches and behind the door hinges today. It's looking much better for it 😎 We weighed the doors before we put them back on. The driver side door weighs 25.8kg and the passenger side door weighs 22.7kg. I don't know why they are different but, we have plans to save a little bit of weight off each one.

Picked up the aluminium differential casing from G19 Engineering this afternoon as part of our differential upgrade project. They have done a fantastic job welding up both sides of the arms.

We don't know if this is overkill for our MX-5e but, we have an upgrade path to 215hp and 400Nm of torque, so it makes sense to do it right. We have replaced the side seals before putting it all back together.

Today was our best solar energy generation day so far in 2024 for our solar project, with 39.4kWh.

We exported 32.8kWh on the Octopus Flux tariff and this would be a enough to fully charge our MX-5e using our Zappi smart EV charger.

Another delivery today from Inductive Autoworks (they supplied the reduction gearbox) for the MX-5e. This is a three-part kit to allow the Nissan Leaf motor to be remotely mounted from the inverter. It includes a kit for the battery (dc) supply to the inverter and a kit at both ends of the 3-phase cable linking the inverter and motor.

This is the kit for the 3-phase output from the inverter. This is top quality engineering and beyond our fabrication skills. We don't want to take any short cuts with the high voltage (400V dc) side of the MX-5e. When the DVLA inspector looks at the vehicle to register it as an EV, we want them to see top quality workmanship. These kits provide protection from moisture ingress.

We translated our 3D printed tunnel plate to 1.5mm aluminium sheet. This will be powder coated. The plan is to mount the Forward, Neural & Reverse (FNR) switch on this plate.

We have fabricated a battery plate and this is bolted to the chassis using existing holes. It will also be powder coated. There are also existing holes for a battery fixing strap.
This approach allows us to minimise the length of the battery cables, to minimise the weight. The positive cable runs through the bulkhead using the old speedo cable grommet, to the main fuses on the other side.

We have prototyped a mounting plate under the dash (mostly behind the heater matrix) on which we will mount the main fuses (on the right, so that they are accessible) and some other bits.

As part of the ambient lighting we have 3D printed and fabricated replacement cabin lights that don't look like they are from the 1990's.

Made a good start on the aluminium radiator & fan mount/shroud. A little bit more to do, to fix the lower edge and to route the hoses through it. This will be powder coated when it is complete. If this is not up to the job of keeping the batteries cool, we may look at a larger radiator with twin fans.

Made a start on the final part of the restoration and removed the rear sub-frame today. This frame and suspension arms are being shot-blasted and powder coated to go Yoko later this year. The only bits we are reusing here on the MX-5e are the rear uprights. We have new wheel bearings and drive shafts to match the newly refurbished LSD.

With the sub-frame out of the way, we could then remove the fuel tank. This took ages as one bolt would just not come undone and rounded off. We eventually cut it with an angle grinder and removed the stub with some heat and mole grips. Annoyingly time consuming! The empty fuel tank weighs 11.1kg.

The chassis/bodywork under the fuel tank was in really good condition, with just a few spots of surface rust. It is all being cleaned up and treated, then primed with Buzzweld glass reinforced primer and several coats of their WAR underseal.

A bit more surface rust underneath the boot as it is more exposed but, nothing major. It will all clean up well. We have remnoved the rear bumper to get full and easy access.

The dc-dc converter arrived from Fellten today. It's a 206V to 454V, 1KW charger for the 12V battery but it also supplies the car 12V components when in operation. It comes with connectors and instructions are on the Fellten website. It weighs 2505g.
Having stripped the metalwork on the rear of the MX-5e, we treated any rust.
Applied Buzzweld glass-reinforced primer to the rear of the MX-5e. In some places we have 2 or 3 coats.
Applied the first coat of Buzzweld WAR underseal to the rear of the MX-5e. Some pictures and videos to come once we have finished the underseal application.

Started taking apart the rear subframe that has come off the MX-5e. The first thing we noticed is that all the brake unions and brake pipes really need to be changed, so we have ordered some pipe, fittings and a brake pipe flaring tool to replace all the bits that of the braking system that have not been replaced already.

We stripped the old rear sub-frame. On a 30+ year-old car nuts and bolts are going to be rusty. We already have new alignment bolts but we are replacing all the others too. A few snapped as we tried to undo them.

The 29mm hub nuts are super tight and the corrosion does not help. We managed to get one undone but, could not get the drive shaft to move. We left it sitting in PlusGas. The hub nuts have a standard thread and are not handed.

The other 29mm hub nut simply would not budge! We have left this sitting in Plus Gas too and will try again tomorrow. Our Internet research suggest that these things can be problematic.

Really pleased with how the ambient cabin lights have turned out. Much more modern looking than the originals.

Broke our hub puller tool trying to get the drive shaft out 🙁 Took the hub and shafts round to a friend with a impact wrnech and the the second drive shaft nut shifted after less than a second. The right tools make things easier! He also had a huge hub puller but we couldn't get them to budge. Going to try some heat and a 10-ton press next.
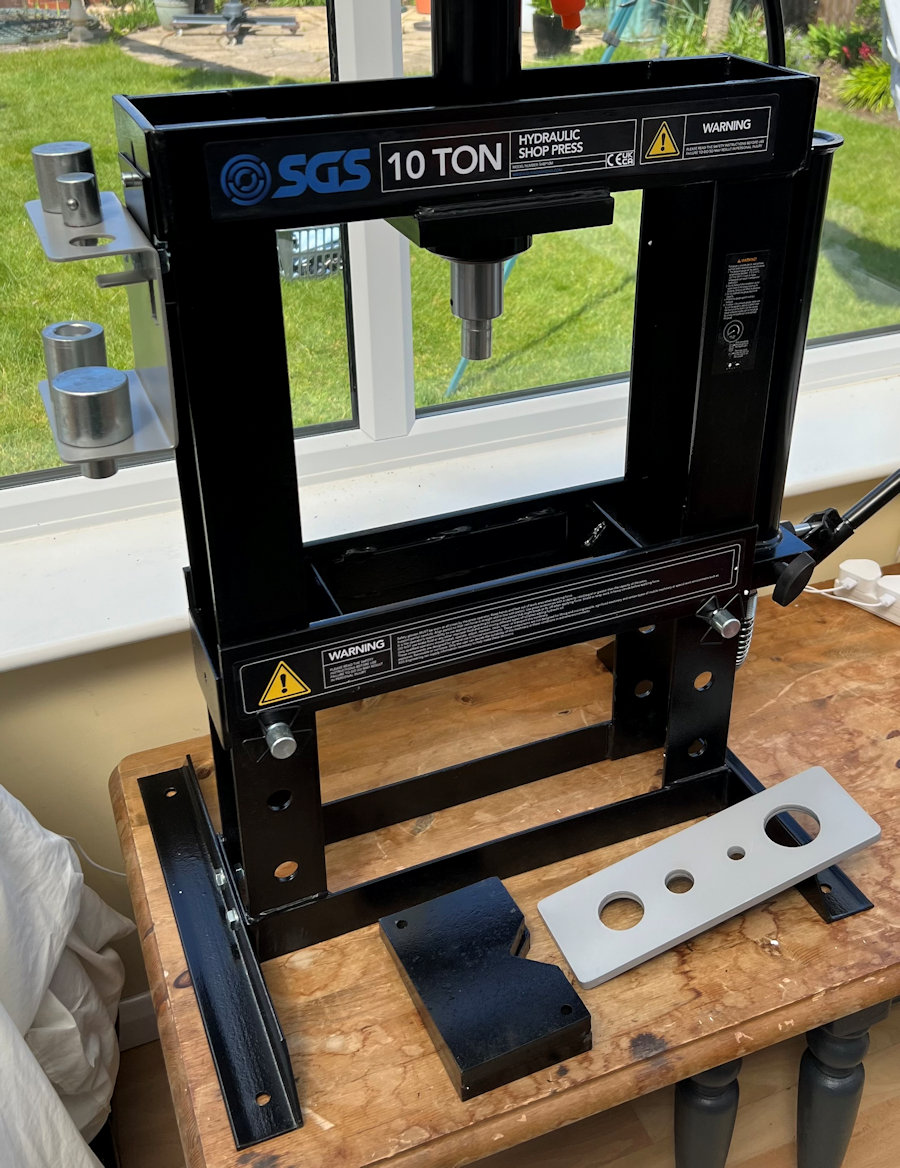
We have a load of bushes and ball joints to remove before we send stuff off to be powder coated, so we have added a 10-ton bench press to our list of tools.

We have bought a 10-ton hydraulic bench press because we have so many bushes, ball joints and seals to remove and fit.

Tried to remove the driveshafts again and the one we undid with the impact driver just dropped out after one hit with a big hammer. The hubs are being stripped, cleaned and painted before the new bearings go in.

The old 1.6 drive shafts have a smaller diameter threaded section than the new 1.8 ones but, fortunately our new rear hub bearing kits came with both sizes of nut.

We have these bolt delivered from MX5 Parts today. We are rebuilding the back end with all new nuts and bolts as there was a lot of corrosion on them.

Another delivery today. We are replacing all the brake pipes on the MX-5e, so we need a good quality brake pipe flaring tool.

Yay! We have finally finished restoring the underside of the car. It has now all been completely stripped and any rust treated, before appplying Buzzweld glass reinforced primer and then WAR underseal.

New handbrake cables from BOFI Racing. One of the old ones would not move and the other one was quite stiff. We tried lubricating them but it made no difference.

We set up our 10-ton press in our conservatory as we have limited room in our garage. It made it really easy and much quicker to push out bearings and bushes.

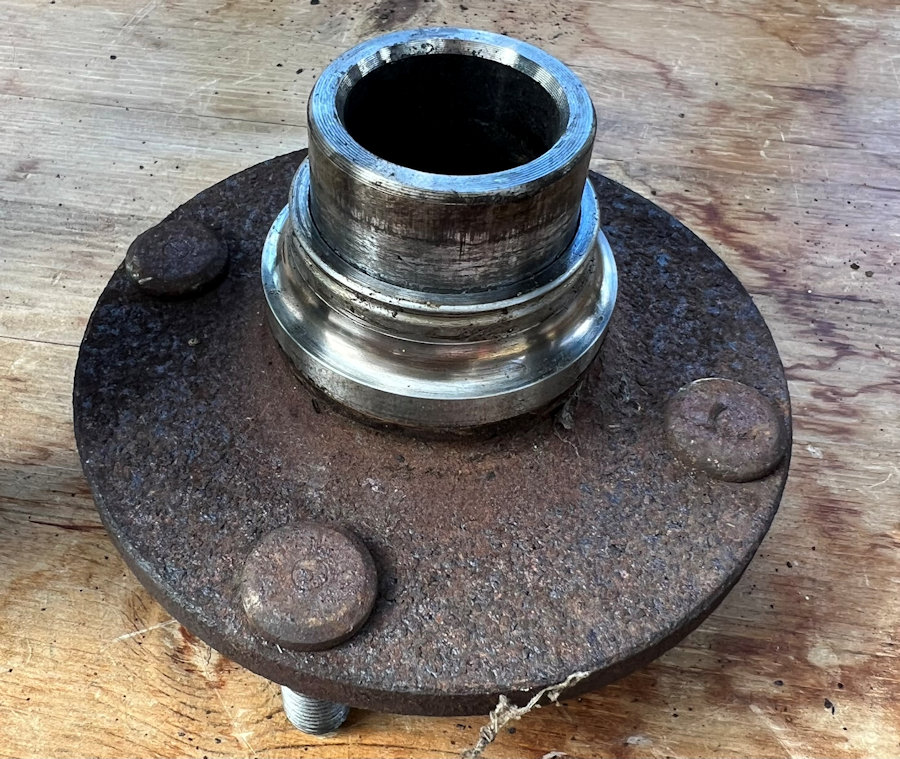
Pushing out the rear bearings breaks them in half and we knew this would happen, so we have new bearing kits ready. The hub carriers are going to be cleaned up and painted black.

This leaves part of the bearing attached to the hub. This is hardened steel, so a notch is cut in this remaining bit and it is split with a chisel. The hubs will then be cleaned up and painted black.

We have a whole load of parts to be powder coated and this is the front part of the car. This includes the front sub-frame, suspension arms, drop links, and anti-roll bar.

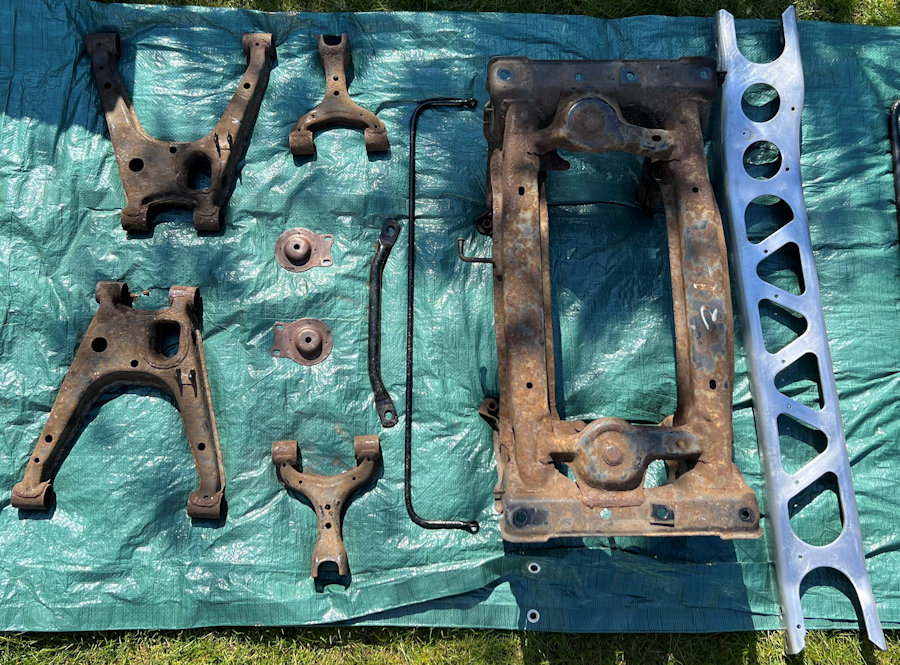
These are the rear parts of the car to be powder coated. This includes the rear sub-frame, suspension arms, anti-roll bar, differential mounting plates, the Power Plant Frame (PPF) and the rear cross brace. Not shown are the steering column mounts and the radiator fixing brackets. We also plan to powder coat the door handles and the hard-top mounting plates.
January 2025 •
February 2025 •
March 2025
January 2024 •
February 2024 •
March 2024 •
April 2024 •
May 2024 •
June 2024 •
July 2024 •
August 2024 •
September 2024 •
October 2024 •
November 2024 •
December 2024
January 2023 •
February 2023 •
March 2023 •
April 2023 •
May 2023 •
June 2023 •
July 2023 •
August 2023 •
September 2023 •
October 2023 •
November 2023 •
December 2023