

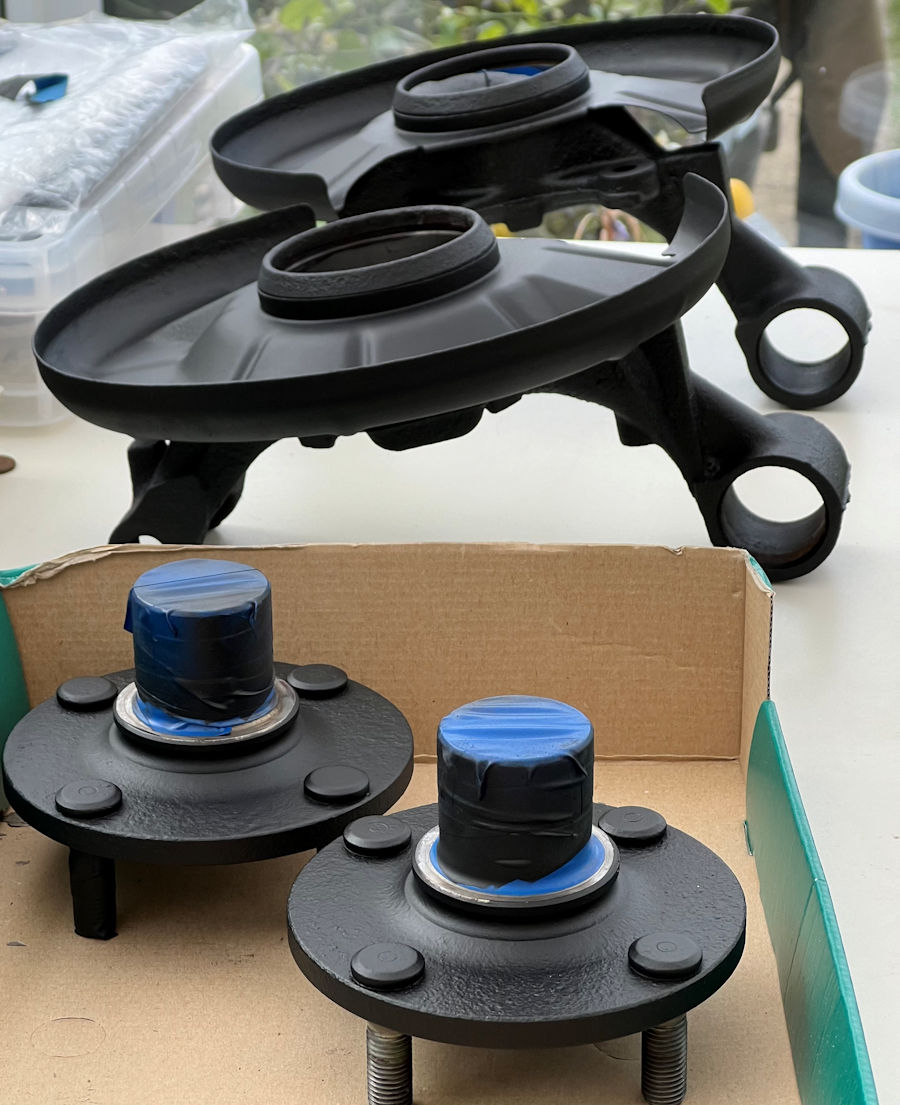
With the second drive shaft finally removed from the rear hub, we set about cleaning up the hubs and hub carriers, then adding a primer coat.
Whilst doing this, we realised that we reached a milestone today. We have now taken off every single nut, bolt, bracket, pipe, clip, wire, bush, bearing, hose, etc. on our MX-5e whilst restoring it and preparing it for the EV conversion. The only two nuts we have not undone are the two front hub nuts, because we don't need to. We have even taken off the doors and had them apart to fit new electric window cables and guides. From here on in, we are only putting stuff back on the car 😎
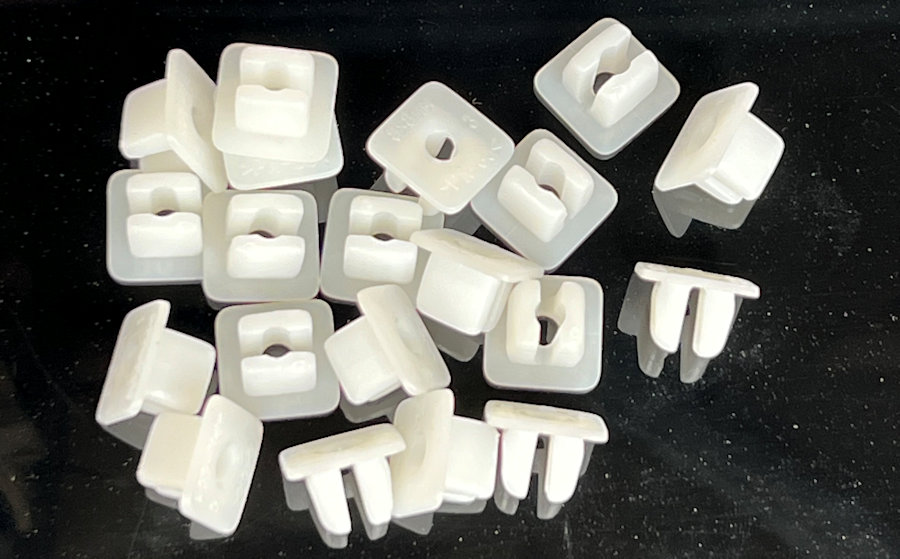
Parts of the wheel arch liners on the MX-5e are held in place with these nylon 'expanding lock clips'. The ones on the car are 30+ years old, quite worn and starting to crumble, so we bought some new ones on eBay for just a few quid.
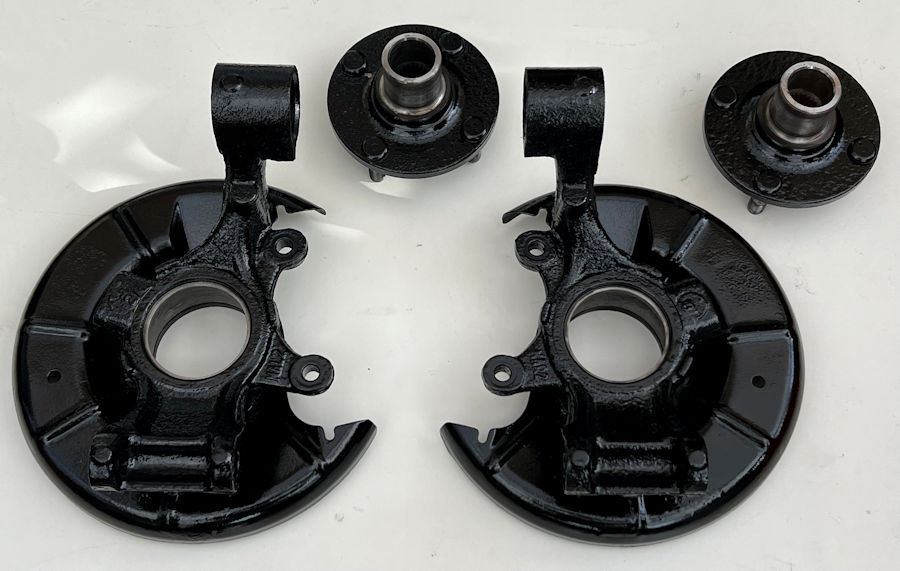
We have finished painting the MX-5e rear uprights and hubs. We didn't powder coat these because there are too many bits that need to be accurately masked off and kept clean.
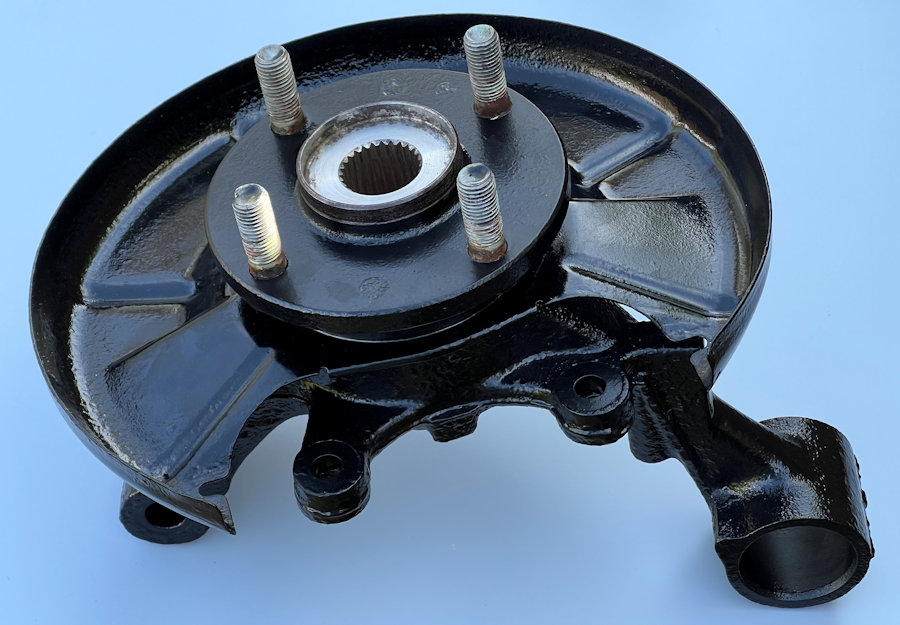
Time to rebuild the rear uprights and hubs with new bearings. You really can't do this job without a hydraulic press. I don't know how we would have done it without all the various sized 'cups' in our bush insertion/removal kit either. We were given a tip to put the bearings in a bag in the freezer for a few hours, to make them easier to fit. We applied the same logic and put the hubs in the freezer too. It helped. We now have both rear uprights rebuilt. They weigh 5.4kg each without bushes.
Dropped all the parts off at the powder coaters today.
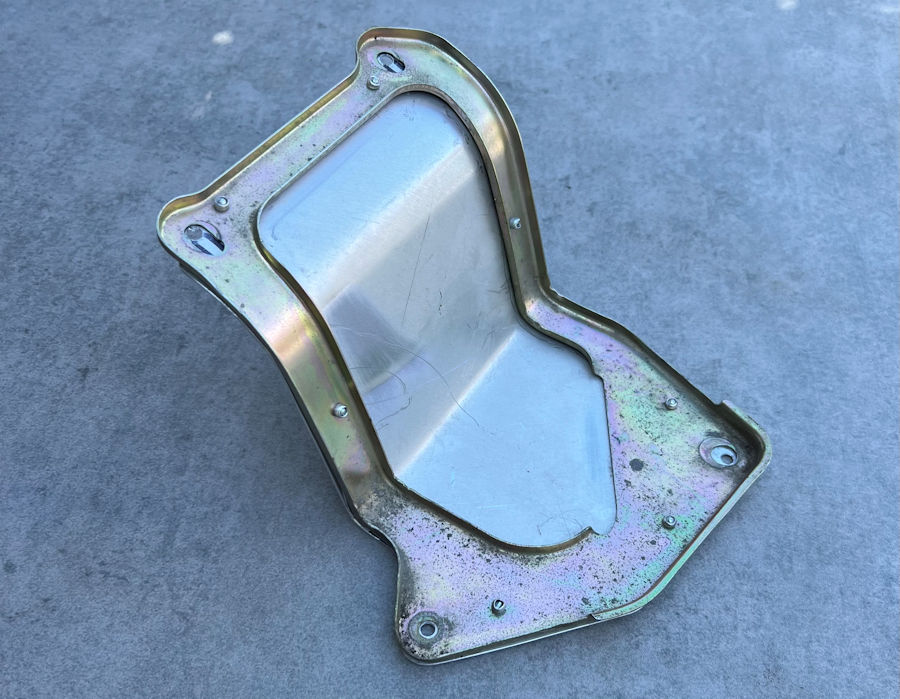
There is a large whole in the boot, where the various petrol tank pipes come through and up to the filler cap. It has a rubber seal and a fixing bracket. We have reused the bracket to fix a blanking cover in place, fabricated from 1.5mm aluminium sheet. This will be powder coated later.

Put the differential back together again today as part of our differential upgrade project. We started with the side seals and Polybushes. We are using race spec/hardness bushes in the MX-5e to maximise driver involvement. With a petrol engine, they might be a bit too harsh but as an EV, the power delivery is much smoother. We can always swap them out for something softer if they prove to be too harsh.
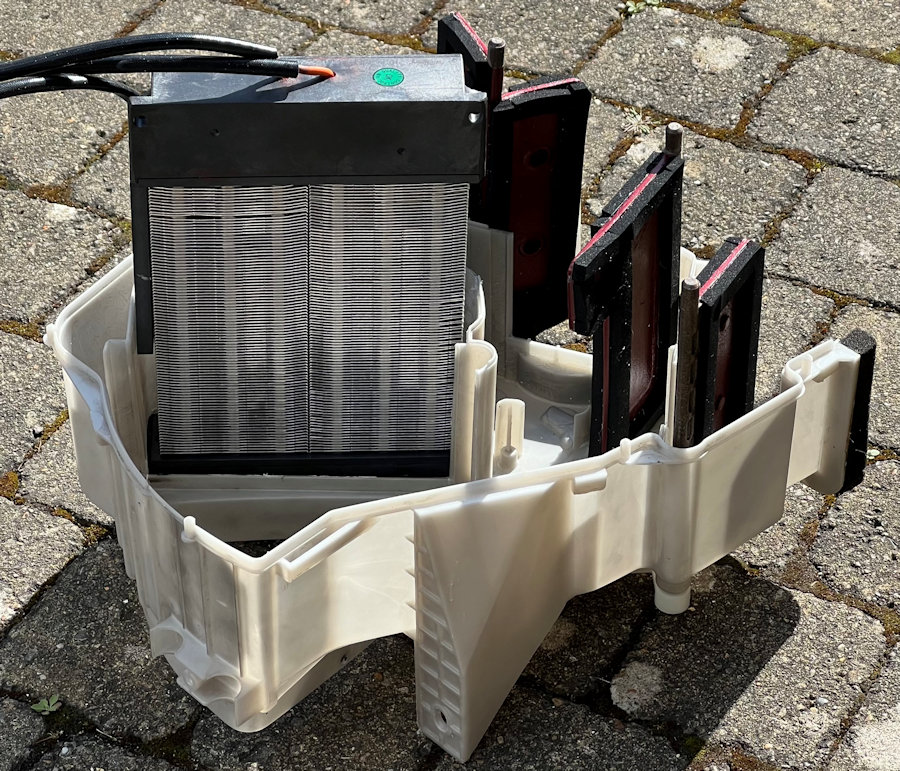
As part of our heater matrix refurbishment project we are fitting a 400V PTC heater into the MX-5e heater matrix. We bought a unit from Fellten which we knew was slightly too big but, it was the only one that was even close to fitting. We assumed that we could fettle the matrix to make it fit and so far that assumption has proved to be correct 😎
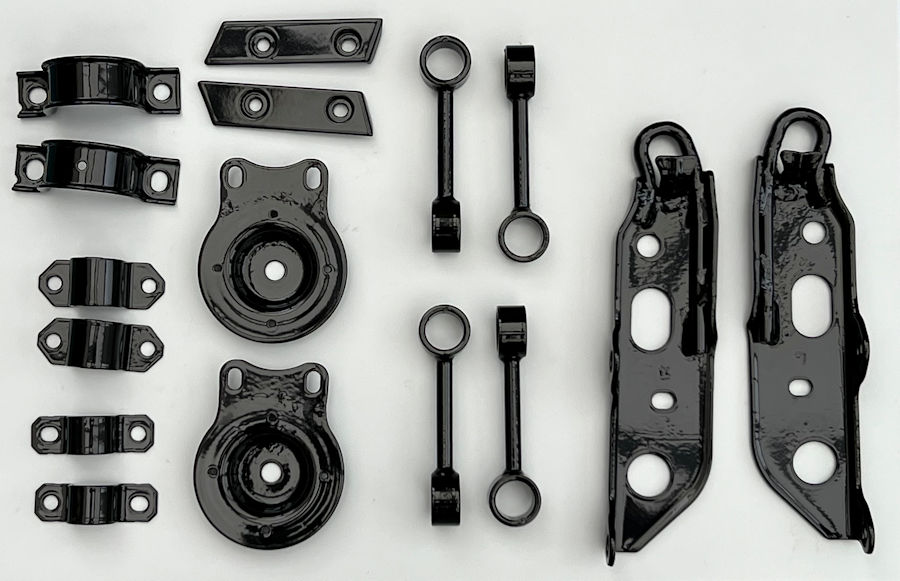
We collected a whole load of parts from Abbey Protective Coatings Ltd near Woodbridge today. The quality of the work done is excellent. So good in fact, that we are going to share pictures of it all here!
This photo shows the smaller parts including the steering rack and anti-roll bar brackets, diff mounting plates and the rear towing brackets.
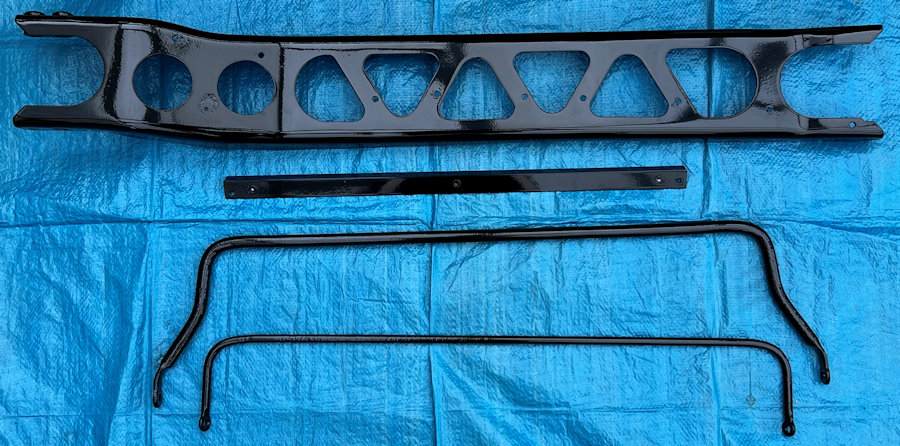
The is the power plant frame (PPF), radiator mounting bracket and anti-roll bars.
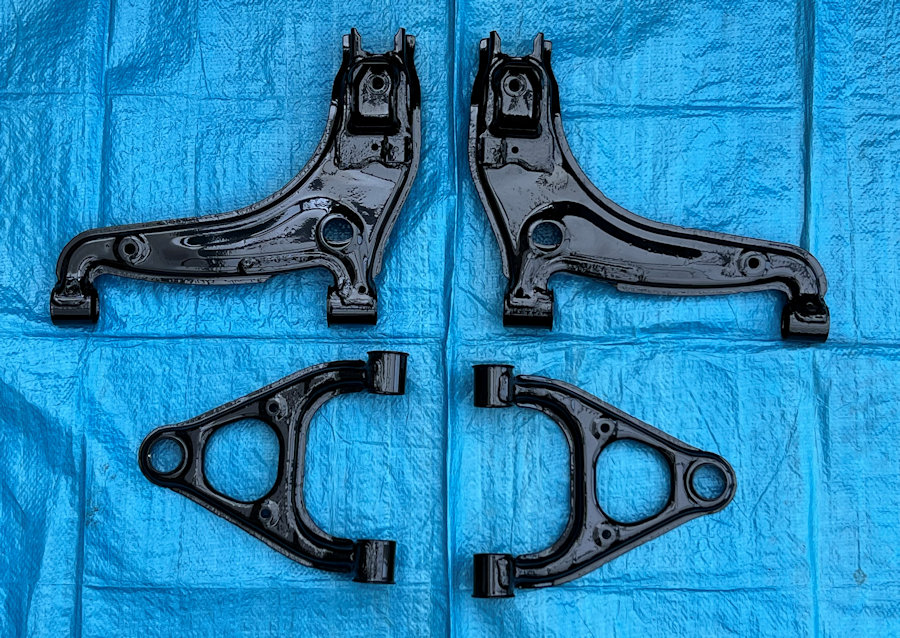
Front suspension arms. We have already fitted newly powder coated parts to the front of the MX-5e as we have three sets between our two Eunos Roadsters.
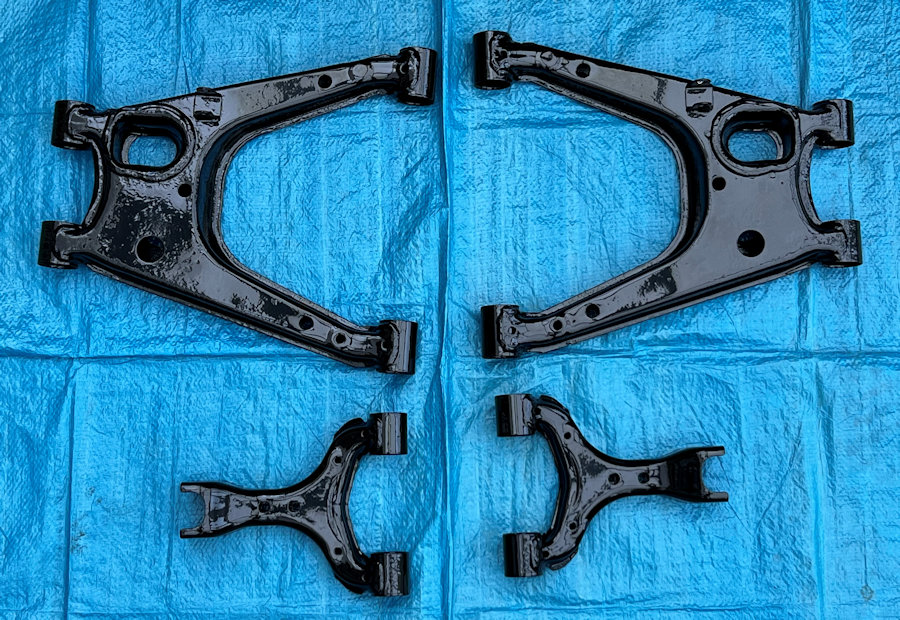
Rear suspension arms.
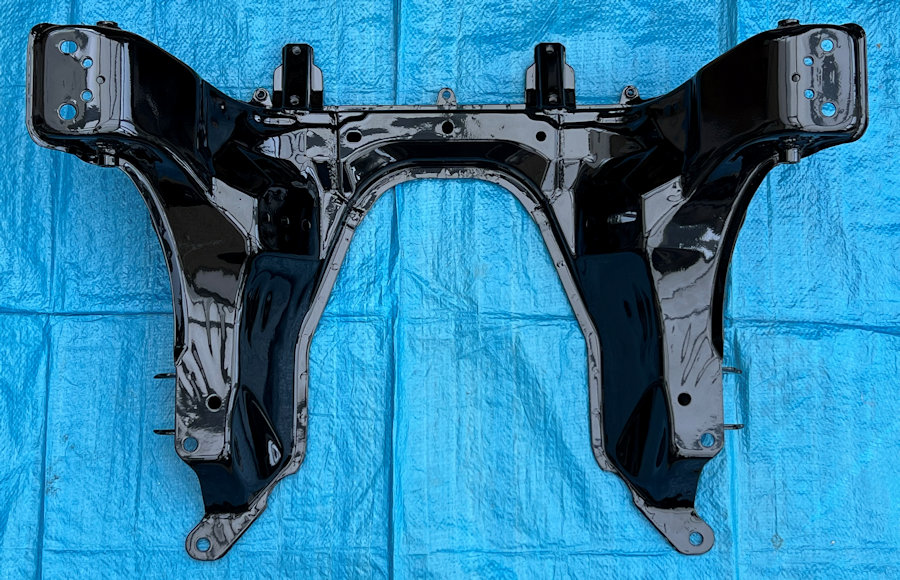
Front sub-frame. Also already fitted to the MX-5e.
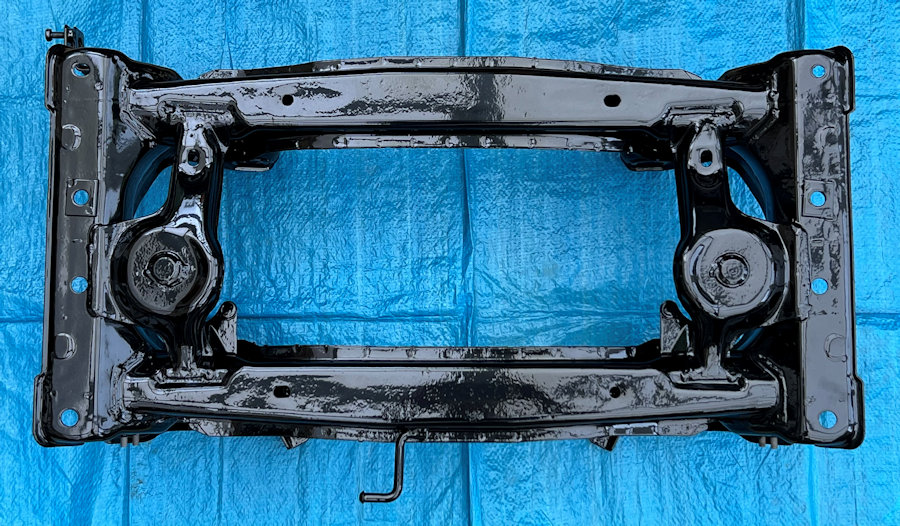
Rear sub-frame.
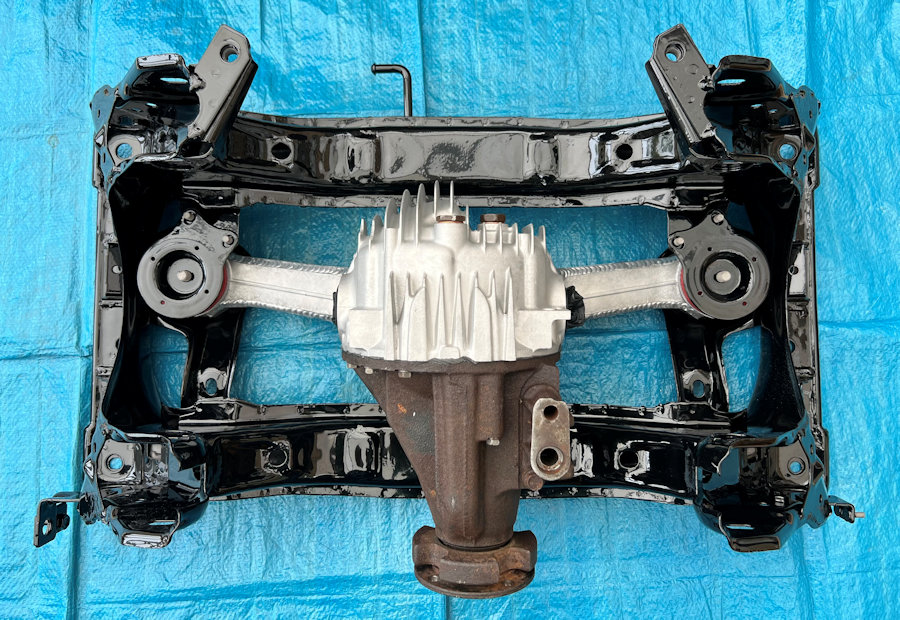
We can now start to rebuild the rear sub-frame up with the upgraded and rebuilt differential. We have new nuts, bolts, alignment bolts, etc. We are also fitting Powerflex Polybushes.

So this is what today's challenge looked like. Our goal over the next few days is to rebuild the backend of the car to 'as new' condition using all these parts.
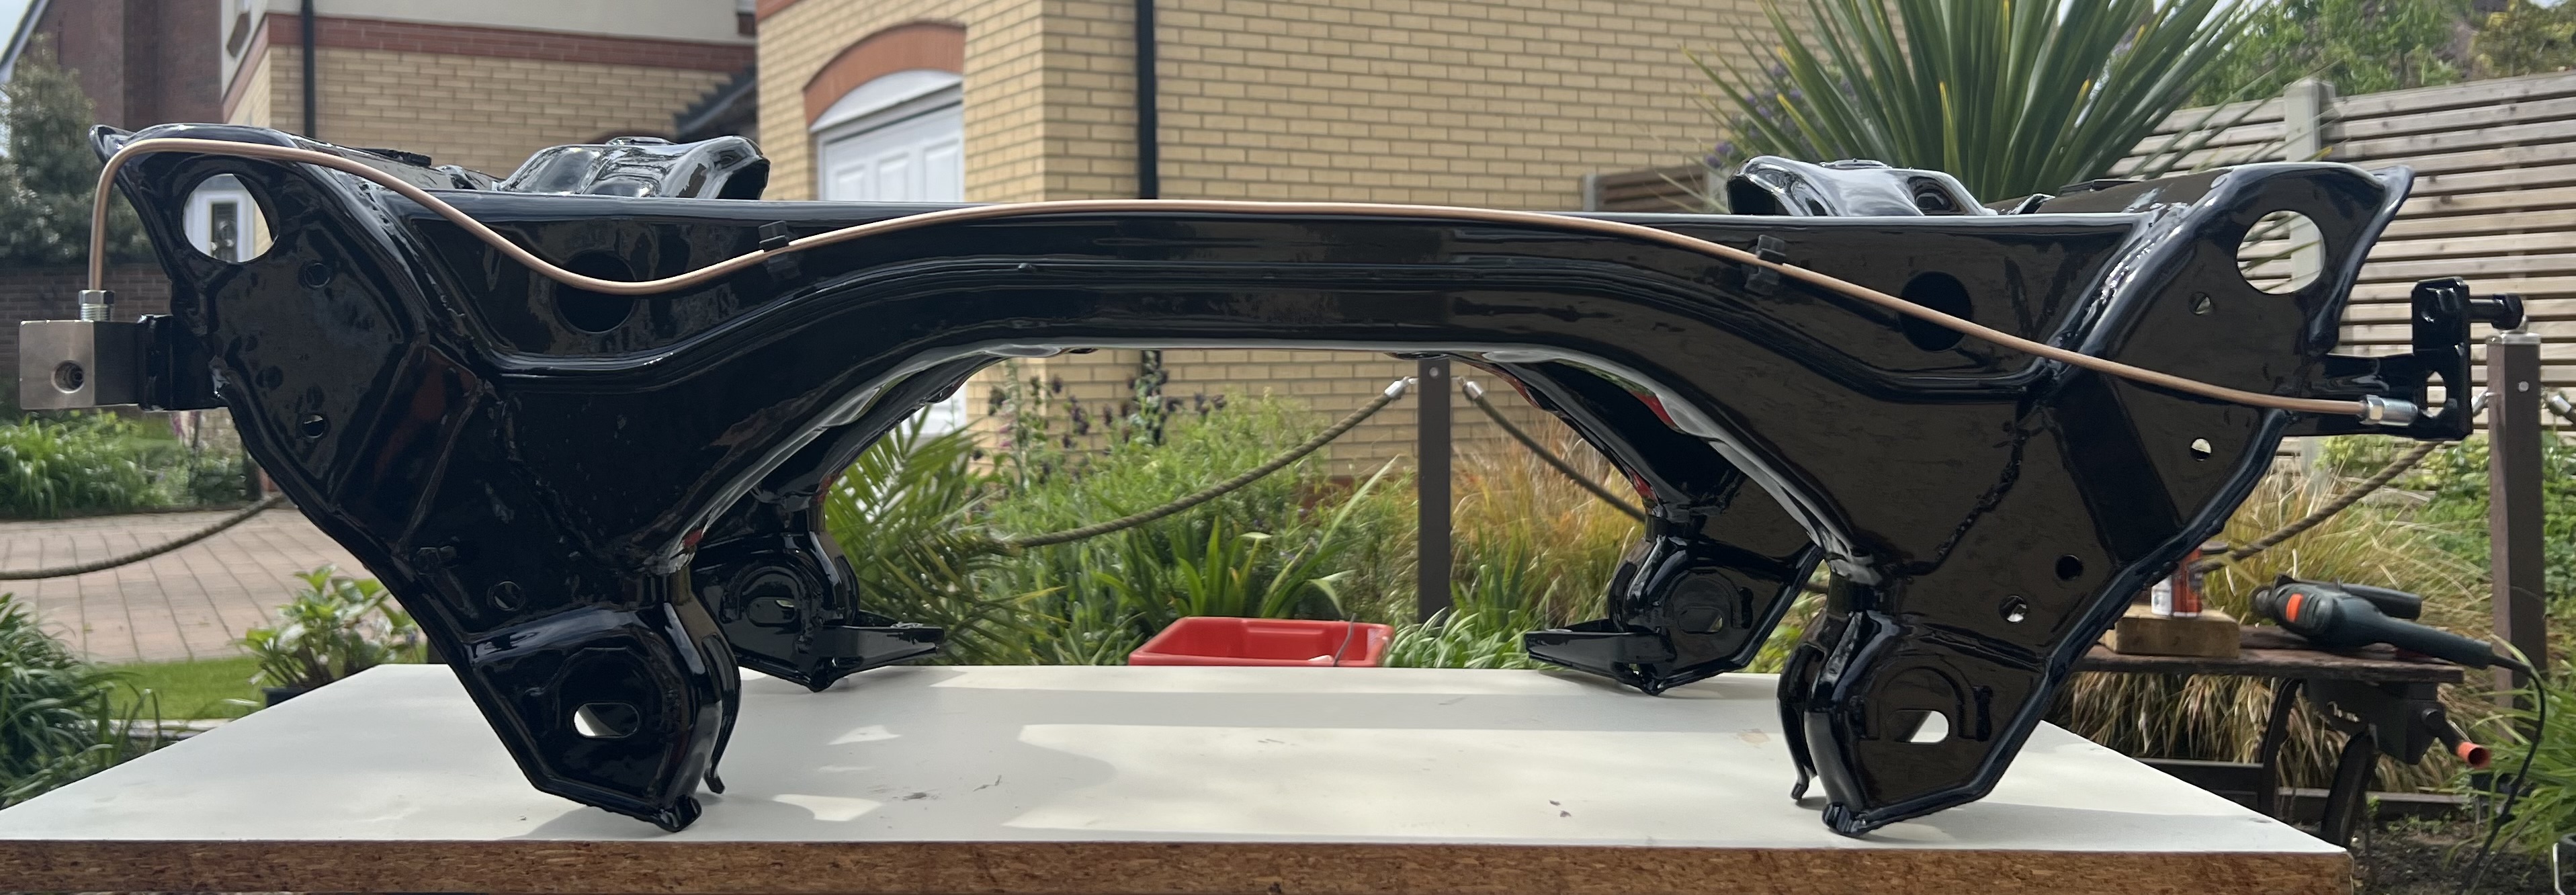
The first job was to fabricate a new brake pipe, to run across the rear sub-frame. We have new 3/8th Kunifer pipe and a new brake pipe flaring tool.
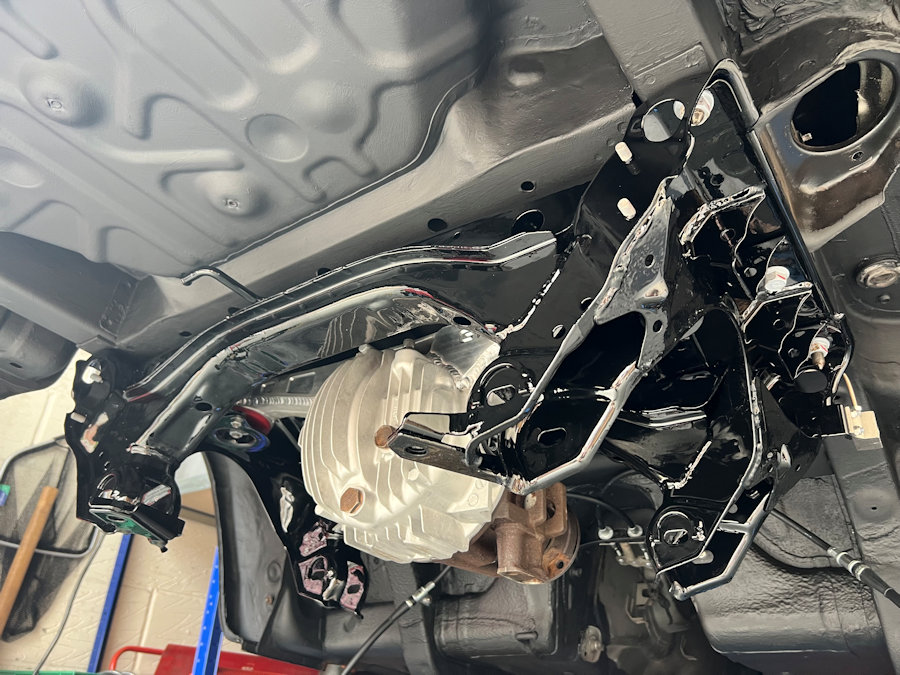
Fitting the subframe and diff was a relatively easy job. Neither are very heavy and there are two of us doing the work.
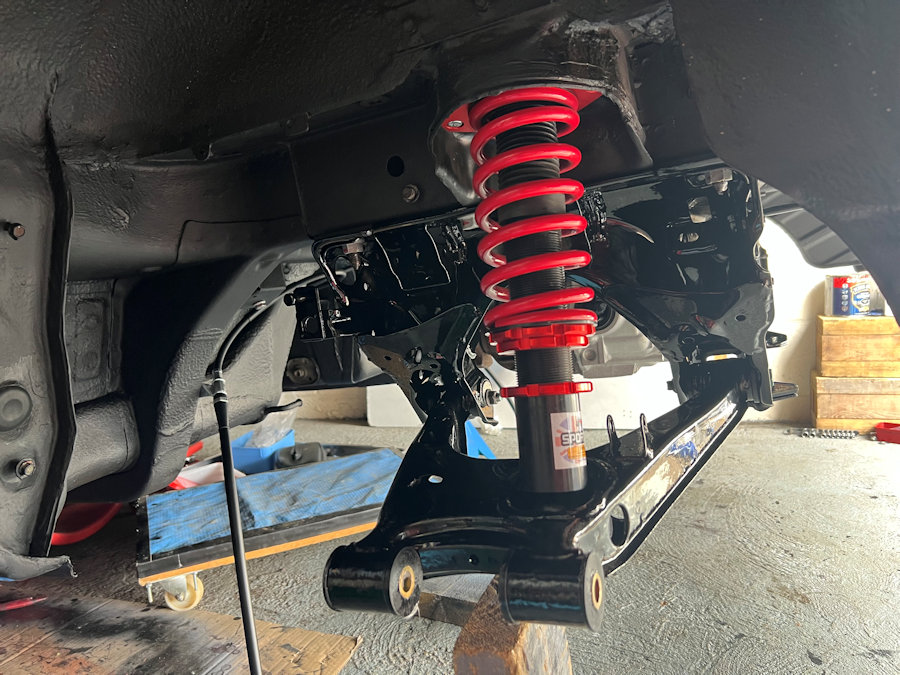
We are fitting new Polybushes to the suspension and using all new bolts and alignment bolts too.
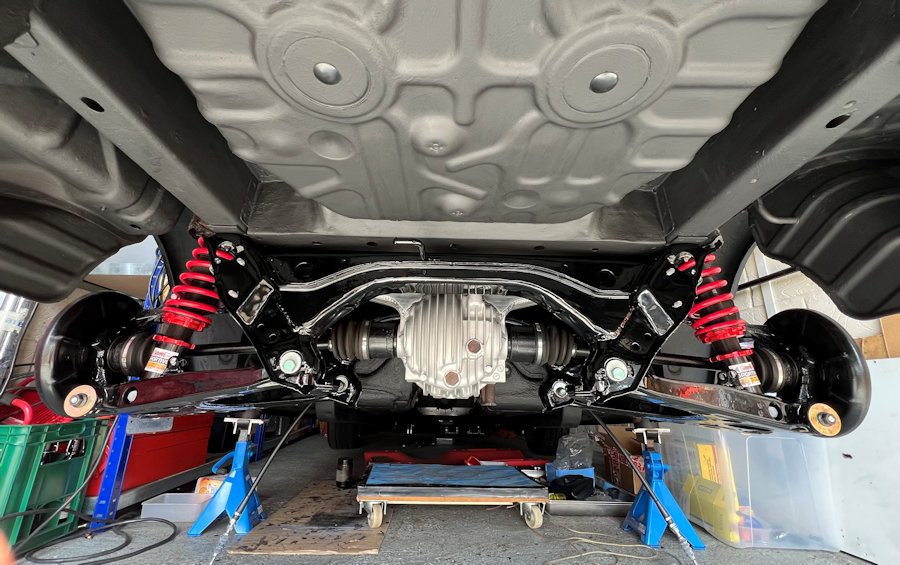
The only real challenges we had today were getting the driveshafts to seat into the differential, because we were wary of using too much force. Having got some advice, we just pushed a little harder and they popped into place. The other challenge was doing up the rear hub nuts tight enough. We don't have a torque wrench that goes that high, so we borrowed one from a friend.

With the car back on the ground, we rolled it out of the garage and weighed it at 587kg. This is giving us a lot of confidence that we can hit the target 970kg weight.
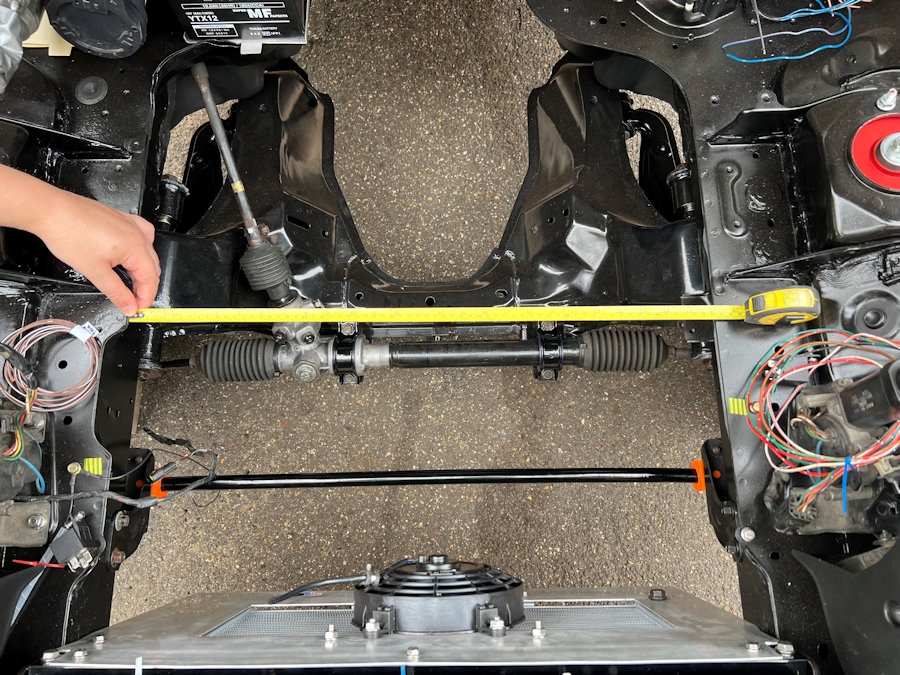
Today was all about measuring up the space for the high voltage battery. In order to do this, we have fitted the Power Plant Frame (PPF) to the diff and both anti-roll bars. The main battery pack will have to sit above the front sub-frame and clear the steering rack and front anti-roll bar. This then leaves a space about 64cm wide. There is potentially room to mount the inverter underneath this location.
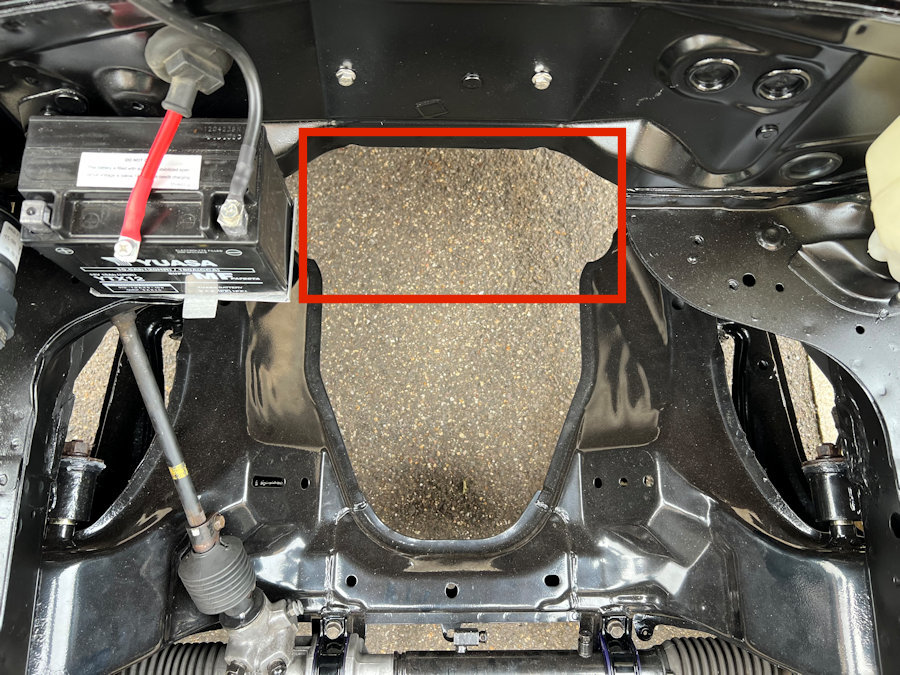
The Nissan Leaf motor will protrude into the space marked with a red box and the battery pack will have to sit between this space and the radiator and fans. This leaves a front to rear depth of about 62cm.
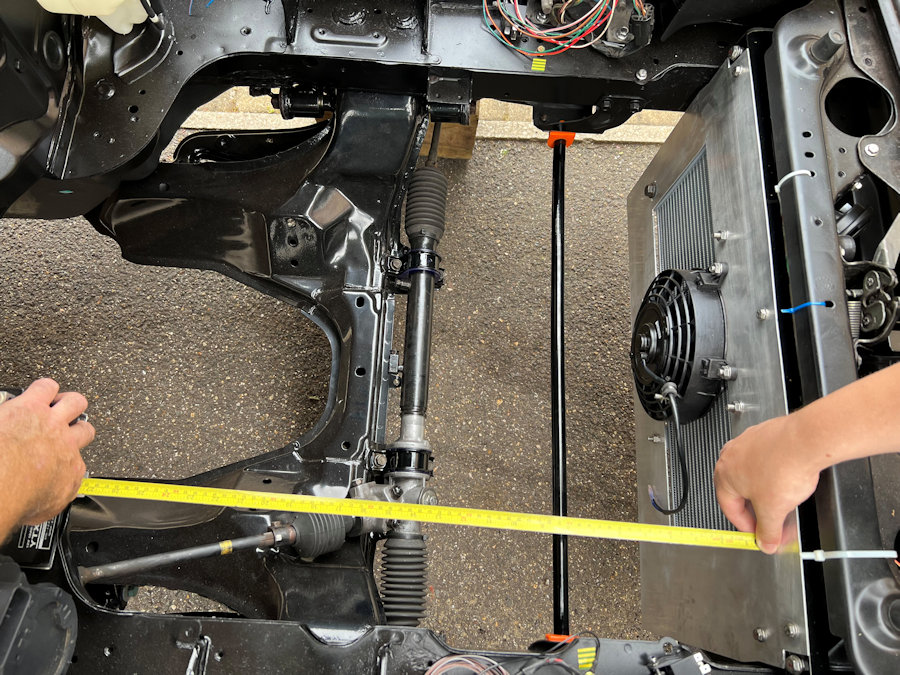
Within the space previously described we have a depth of about 30cm available in which to stack batteries. From our initial measurements, it looks like we can fit 32kWh of batteries under the bonnet and maybe as much as 37kWh. By using some of the space where the petrol tank sat, we could fit a bit more but, our preference has always been to focus on about 30kWh and to keep the weight as light as possible. We don't need more range.
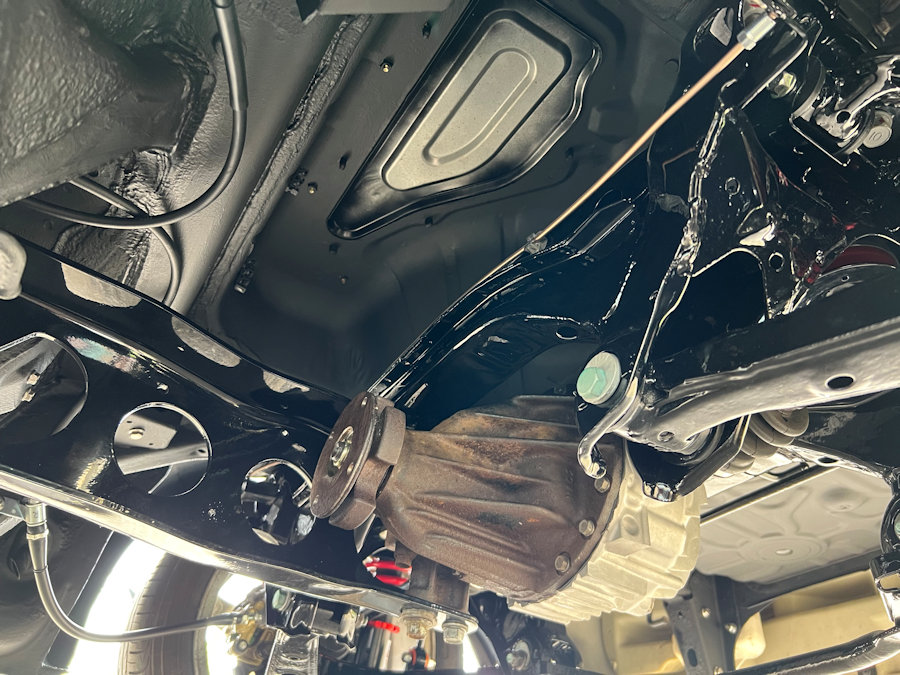
Should we need more space for batteries (very unlikely), we also have the space where the petrol tank sat. There are also four 8mm mounting points to easily carry the weight. Our current plan for this space though is to fit the charger and dc-dc converter here though.
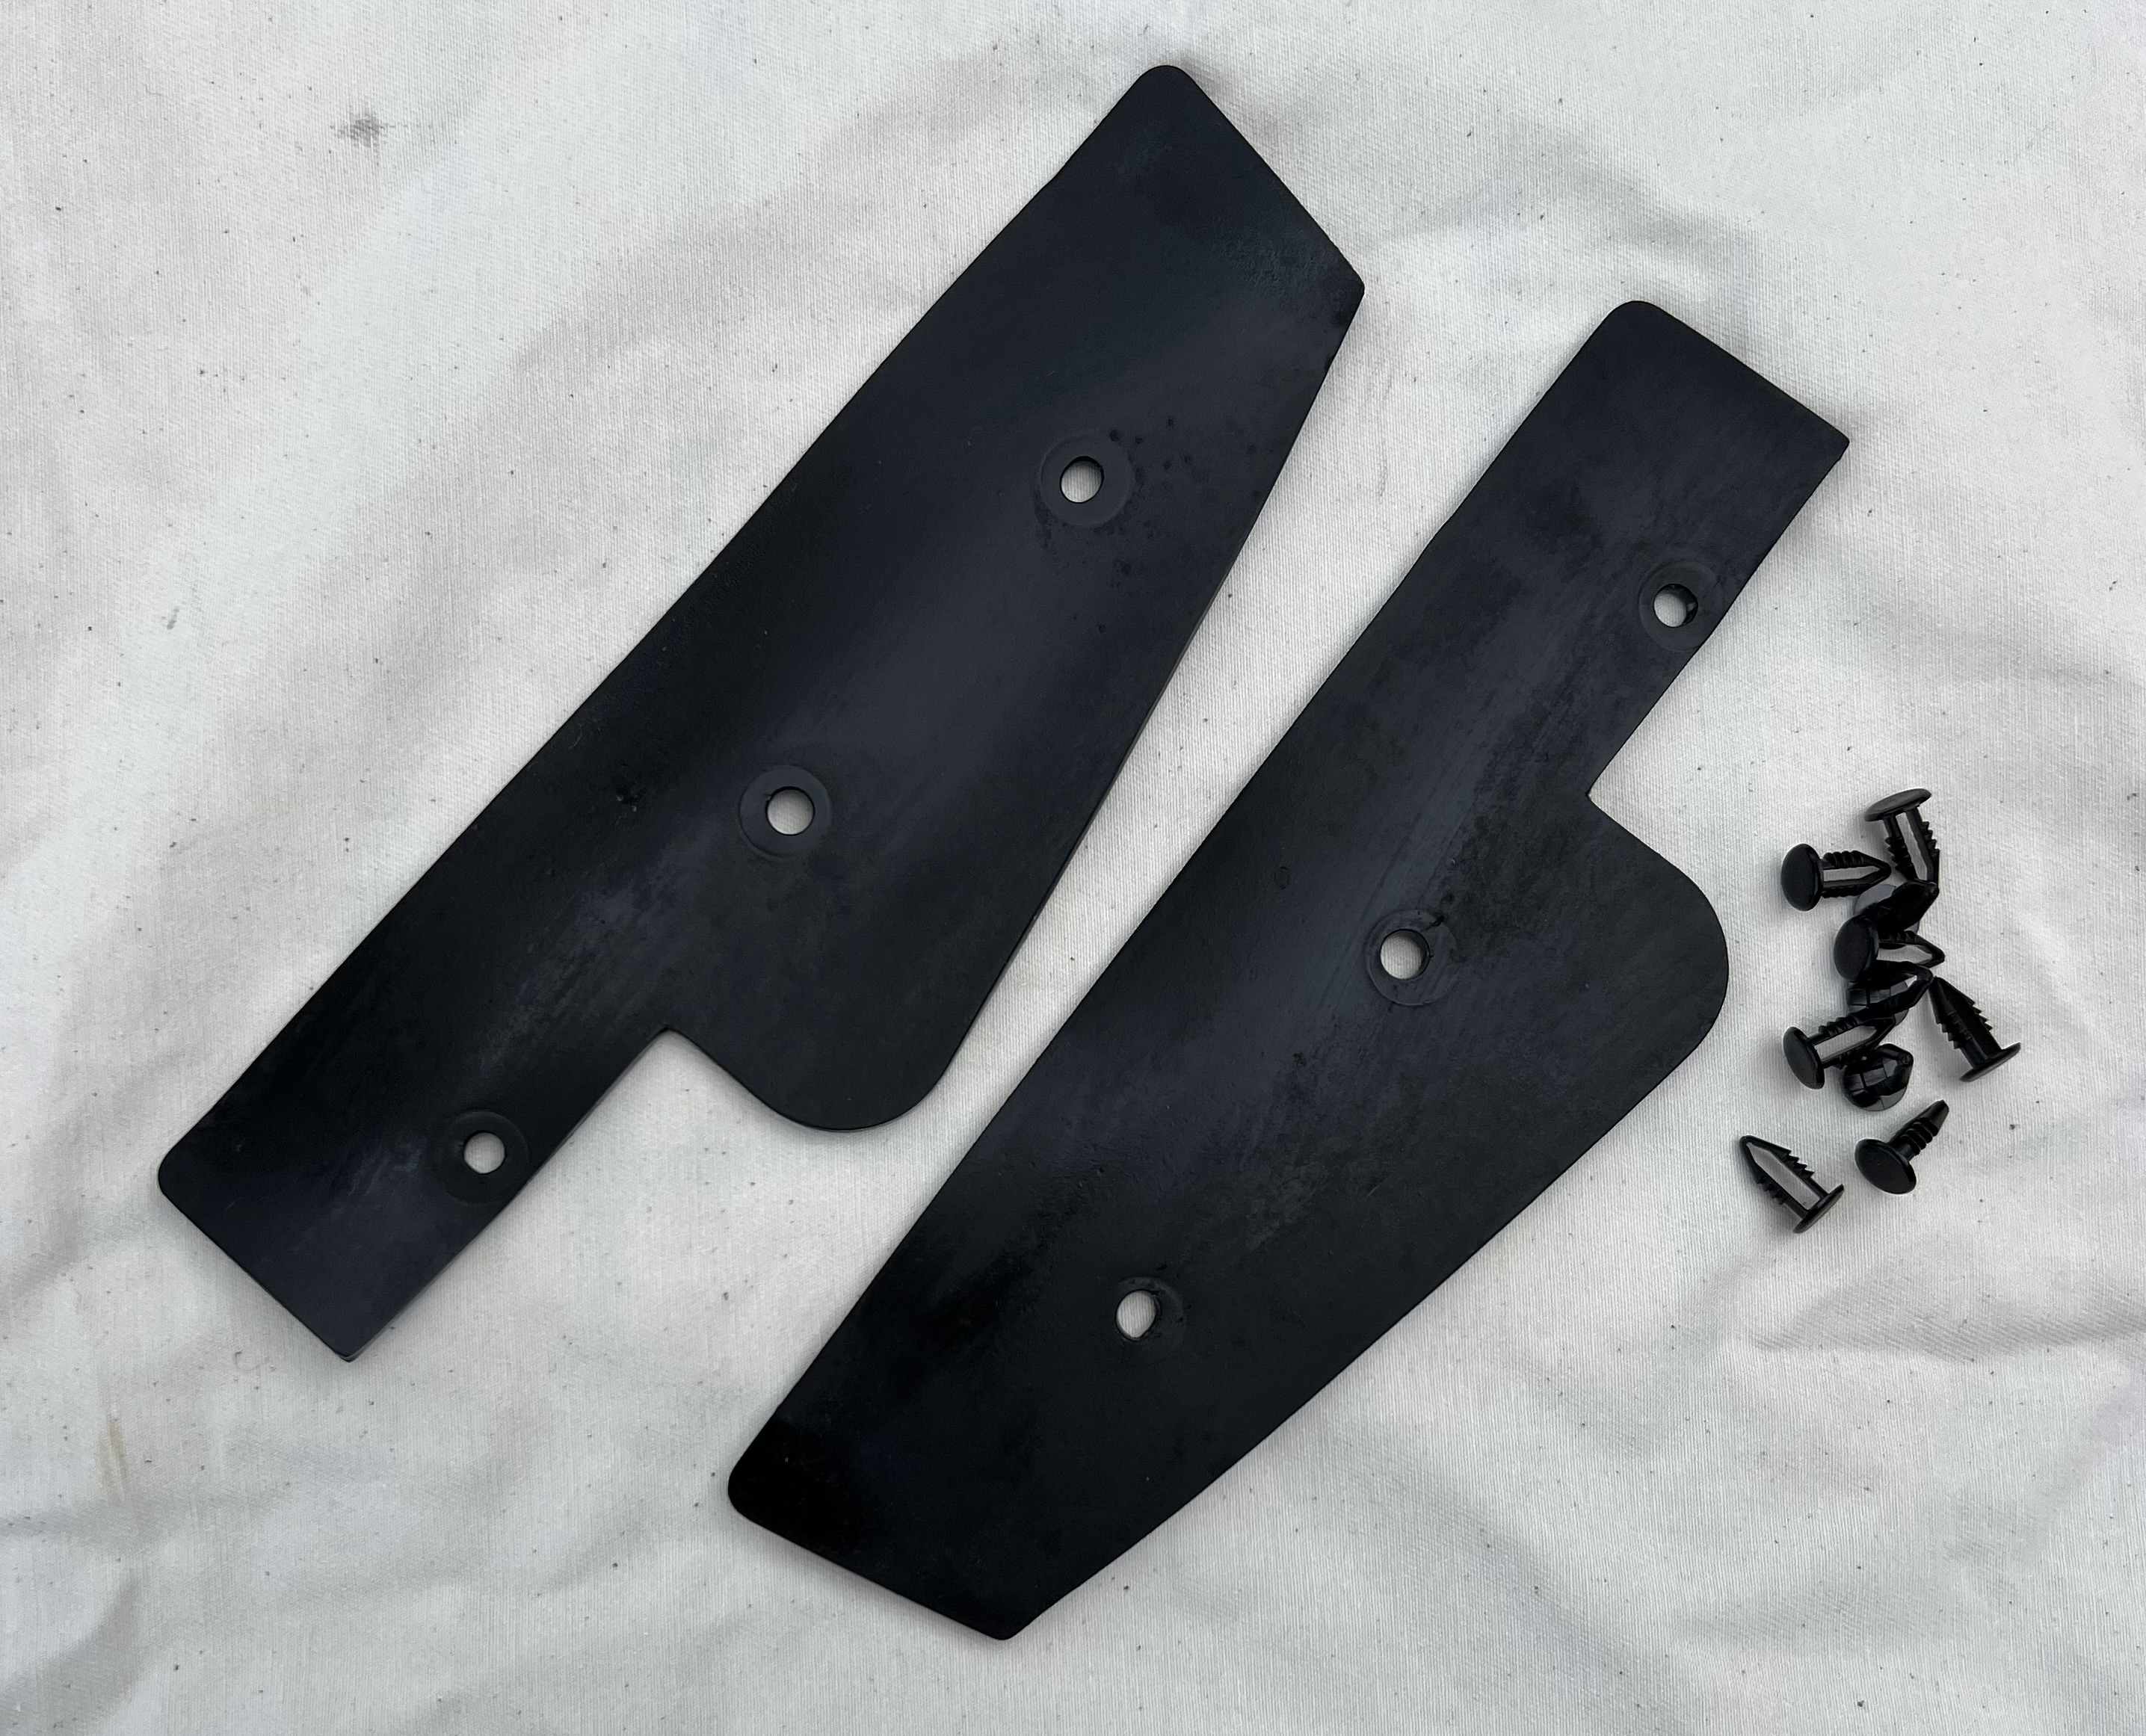
Little things make difference. We are not sure what these rubber parts actually do but, we think they keep dirt off the headlight lens. The plastic clips snapped when they were removed, so we have bought some new ones and cleaned the rubber parts. They have been refitted and added another 94g to the weight of the MX-5e.
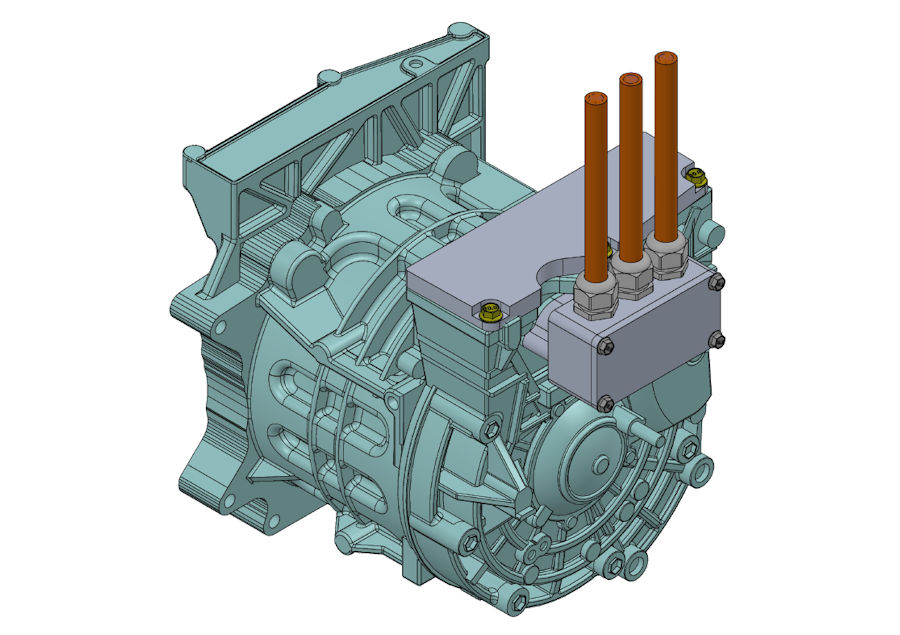
Today's job is to look at fitting the EM57 Motor 3-Phase Wiring Kit by Inductive Autoworks as this will need to be in place when we optimise the best location for the motor.
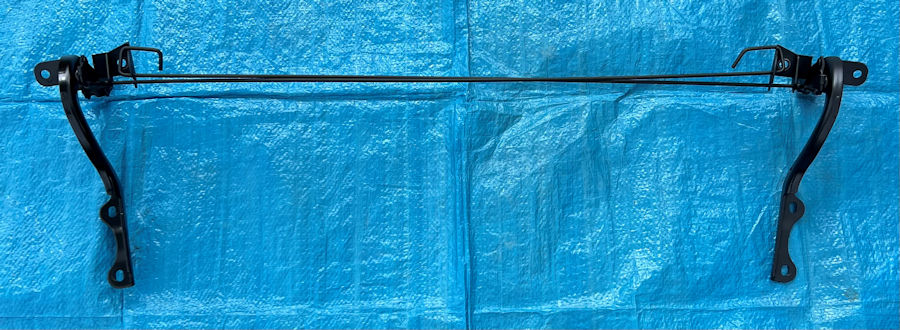
Before we complete the MX-5e wiring in the boot, we are tidying up the inside of the boot and respraying some of the bits that are scratched. We have also refubished the boot hinges and springs. The boot seal has been cleaned and refurbished too.
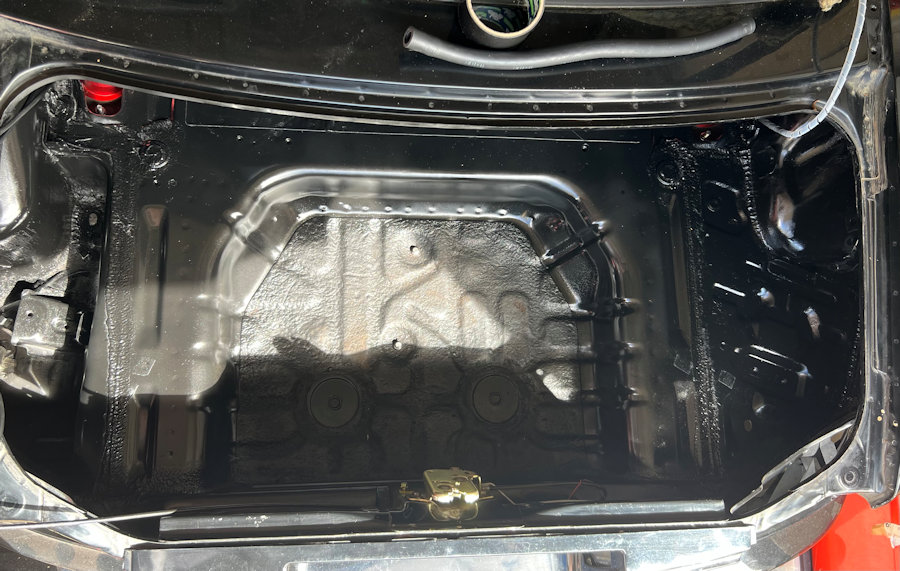
The boot tidy and ready to be rewired. We stripped it down and resprayed parts of it. There are a bunch of shields in the boot, to protect the petrol tank and pipes but, we don't need these in our car and can save a bit more weight by leaving them out.
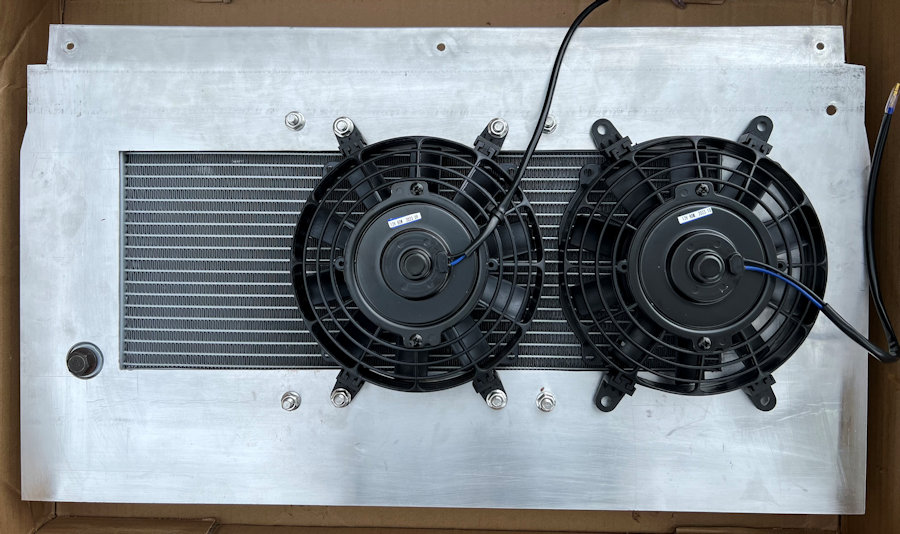
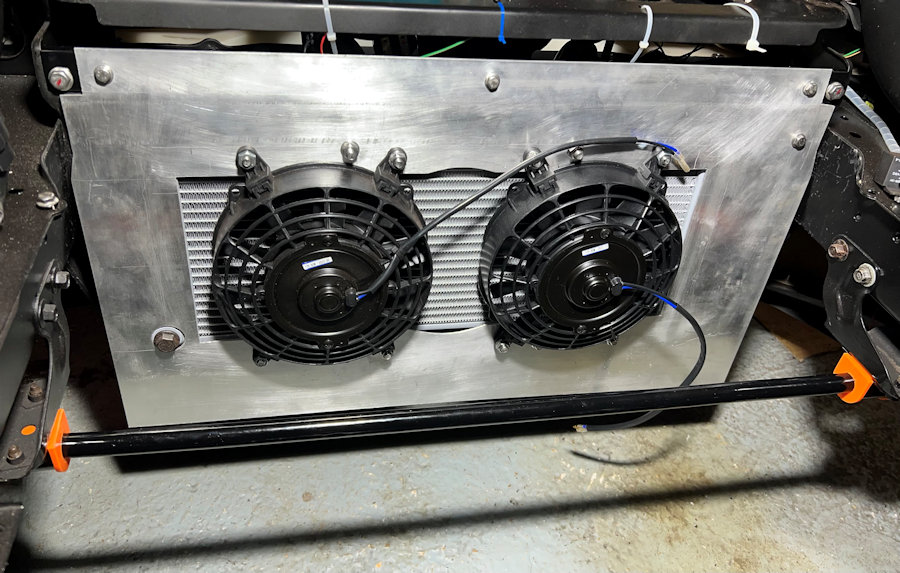
Fortunately, we can reuse the existing fan mounting holes. The whole shroud, fans and radiator shown mounted here weighs 5.2kg, which about half the weight of the original one. We also have much less coolant.
When we are completely happy with the radiator mount, it will be powder coated. We still have a bit more work to seal the air flows better and ensure it meets the undertray snuggly.
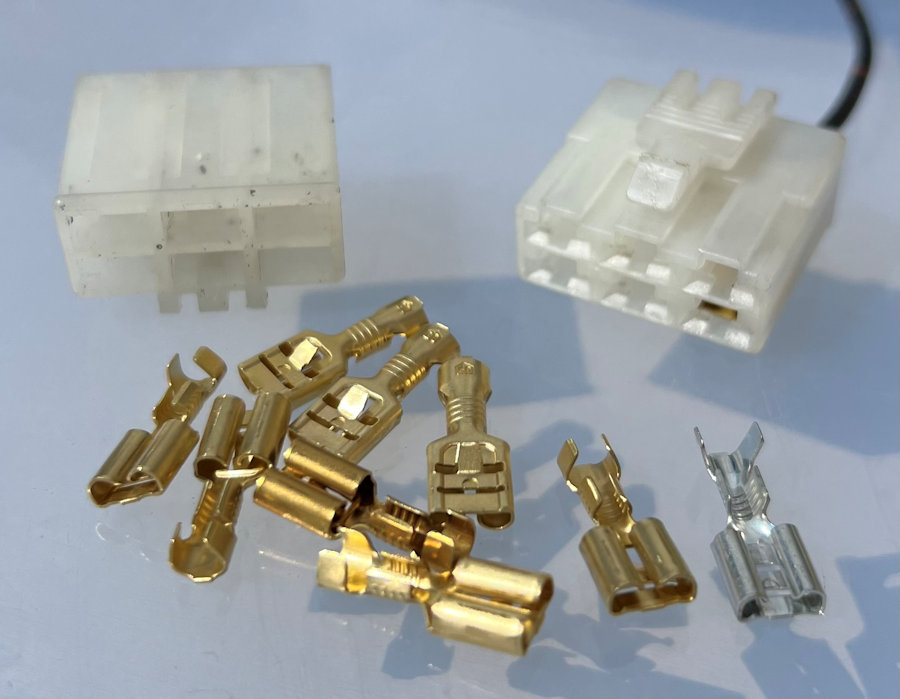
The rear light cluster connectors are bespoke to the MX-5 NA but, with the right tool the terminals can be removed from the matching plug and new 6.3mm spade terminals crimped and re-fitted.
These old style connectors do not using locking tabs on the underside of the crimp terminal. The terminal is held in place by the curled prongs and these need to be big enough to hold the terminal in place. The silver terminal pictured here will not work as there is too big a gap between the curled prongs.
We managed to rewire the back end of the car today, despite the wet weather.
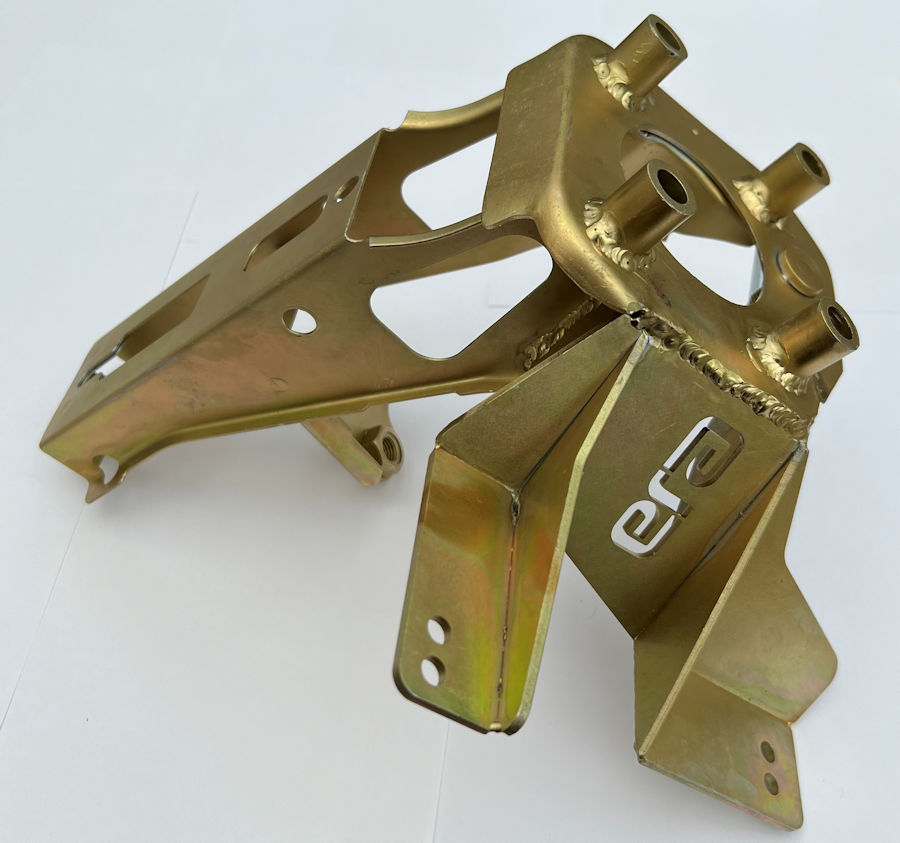
Picked up our pedal box from Doug at G19 Engineering this morning. Doug has modified our old pedal box to mate with the iBooster, strengthened it and also added two-position mounts for the throttle pedal from a mk 3 MX-5. The whole thing has been zinc plated too.
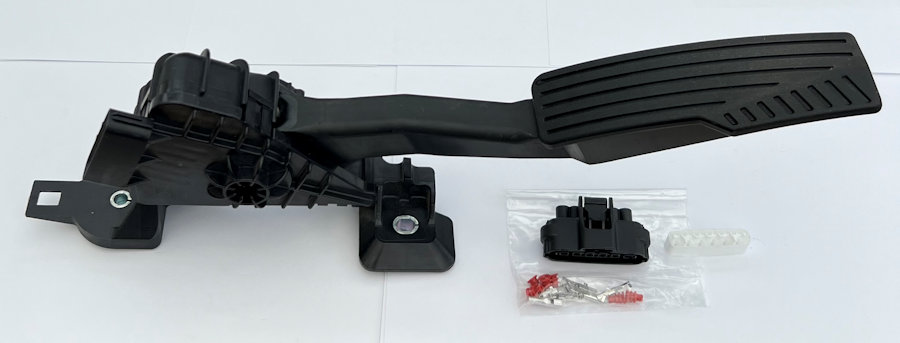
Doug also supplied a second-hand mk 3 throttle pedal and a new matching connector. This makes our life a lot simpler in terms of the engineering and wiring required to get the brake pedal and throttle pedal working as planned. This throttle pedal will interface directly to the Vehicle Control Unit (VCU) from ThunderStruck Motors.
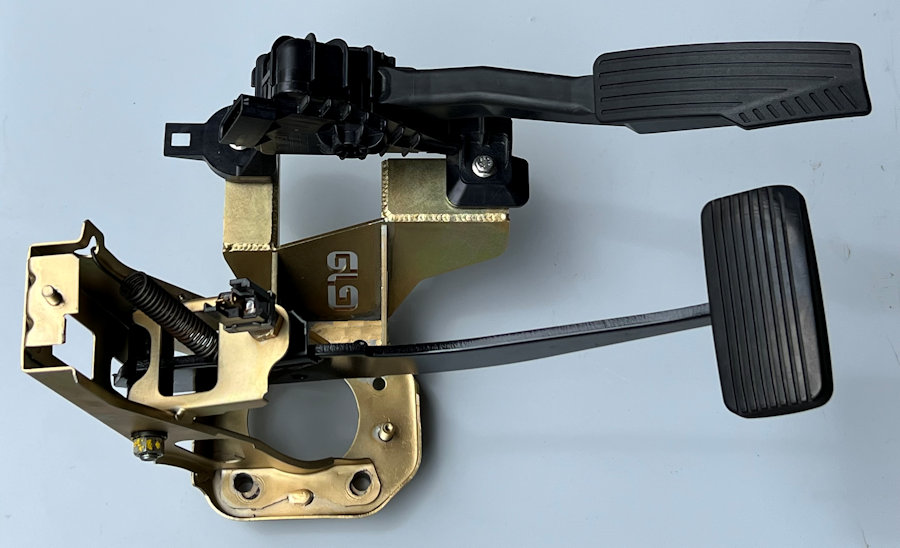
This is the pedal box all back together with all of it having been refurbished and the brake pedal resprayed.
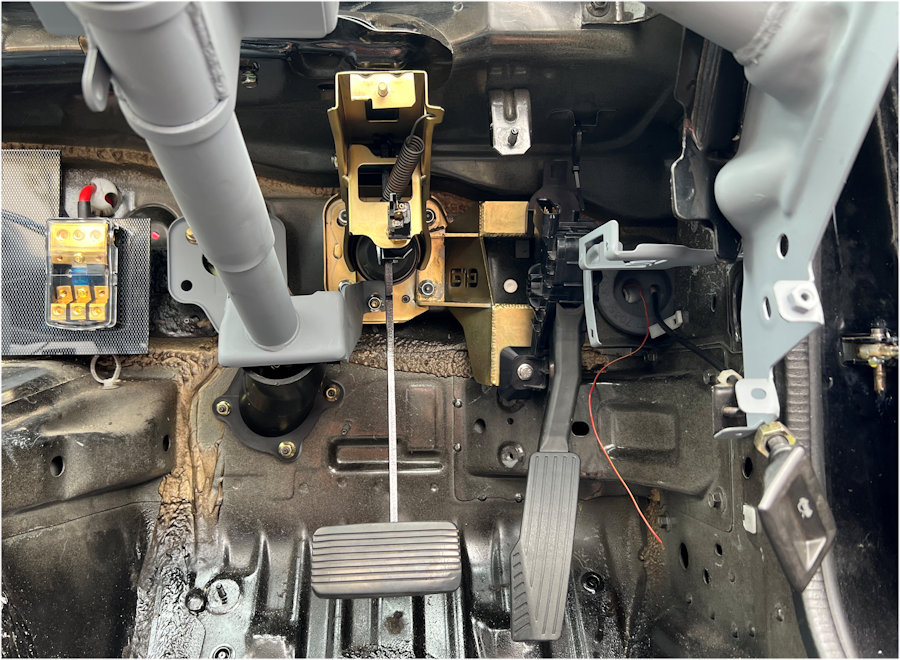
It fits back into the original space perfectly and bolts to the iBooster easily too.
January 2025 •
February 2025 •
March 2025
January 2024 •
February 2024 •
March 2024 •
April 2024 •
May 2024 •
June 2024 •
July 2024 •
August 2024 •
September 2024 •
October 2024 •
November 2024 •
December 2024
January 2023 •
February 2023 •
March 2023 •
April 2023 •
May 2023 •
June 2023 •
July 2023 •
August 2023 •
September 2023 •
October 2023 •
November 2023 •
December 2023